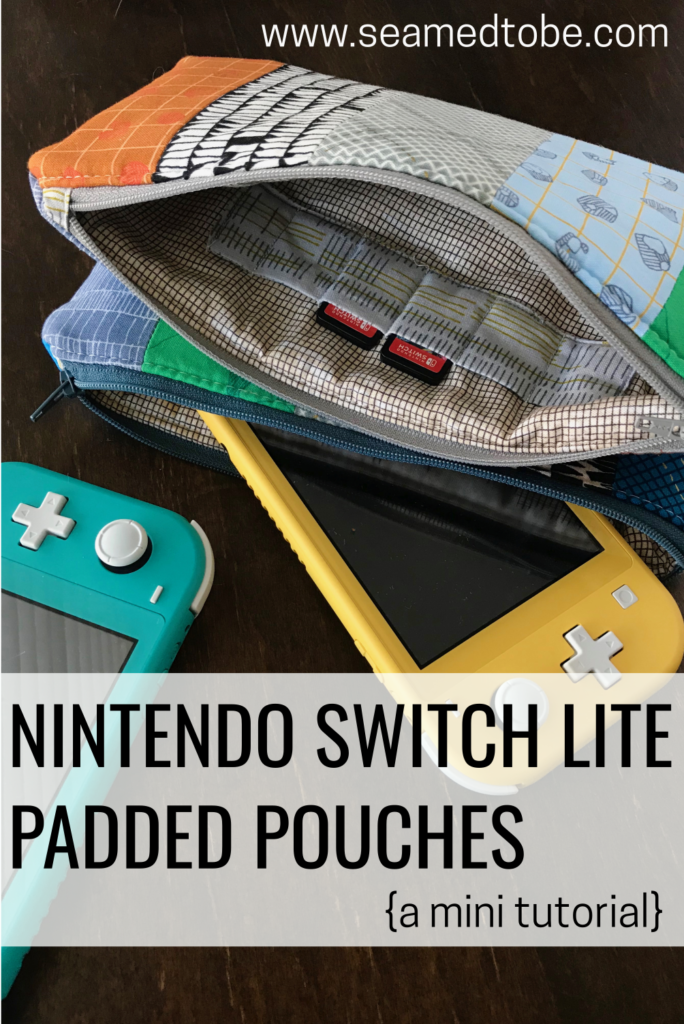
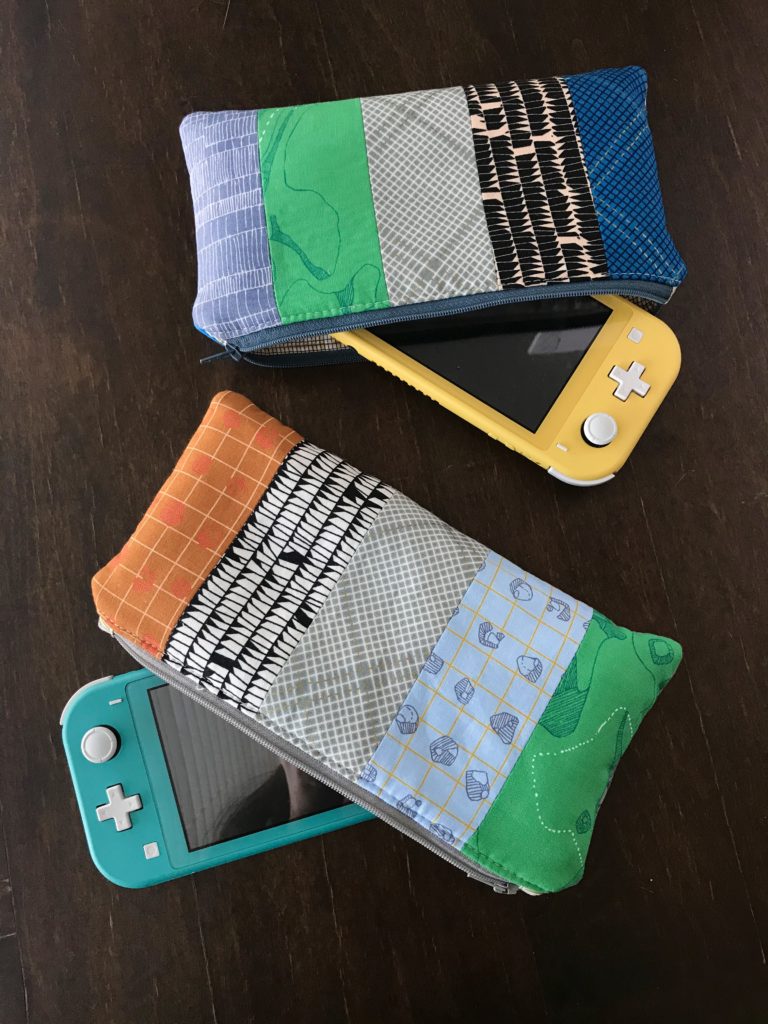
My boys were thrilled to receive their first “my own electronic” for Christmas this year! We got them each a Nintendo Switch Lite and here 6 days later I can say without a doubt they are a hit. I decided to make a padded pouch for each of them for safe storage and bringing on the go.
The following mini tutorial includes materials, measurements, and a few extra steps that make these pouches perfect for Switch Lites. When it comes to the main construction, if you already know how to make a lined zippered bag- that’s great! If not, I happily refer you to this tutorial by Jedi Craft Girl. Amanda does a great job explaining and photographing each step! I will link to her tutorial again later for the main construction of the bag, as to not reinvent the wheel (and respect the intellectual property of another maker!)
IMPORTANT: One key difference between my Switch Lite pouches and her tutorial is that my pouches do NOT have boxed corners, so you can ignore the cutting of a square piece out of each outer and lining panel. Since Switch Lites are pretty flat, our bag doesn’t need that extra step!
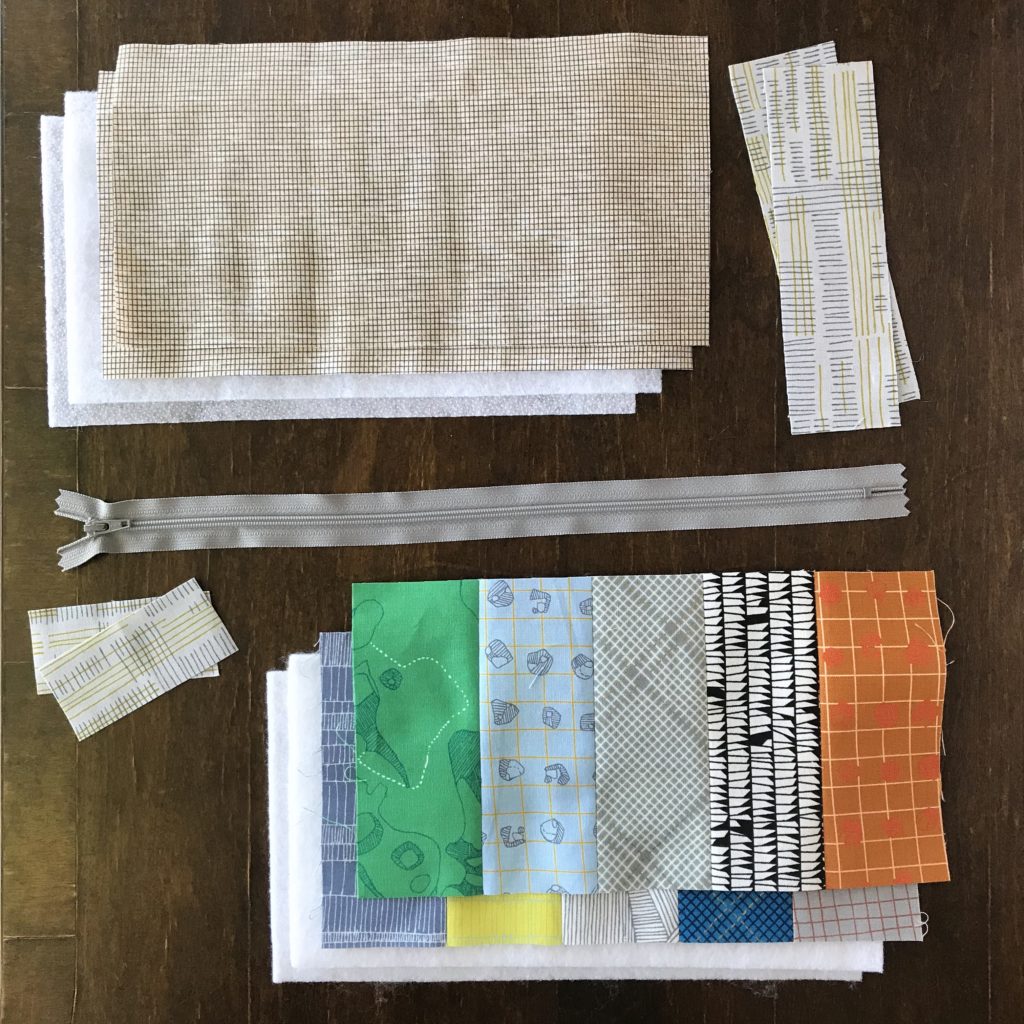
Materials
(2) 5.5″ x 10.5″ heavyweight fusible fleece (for outers)
(2) 5.5″ x 10.5″ thinner fusible fleece (for linings)
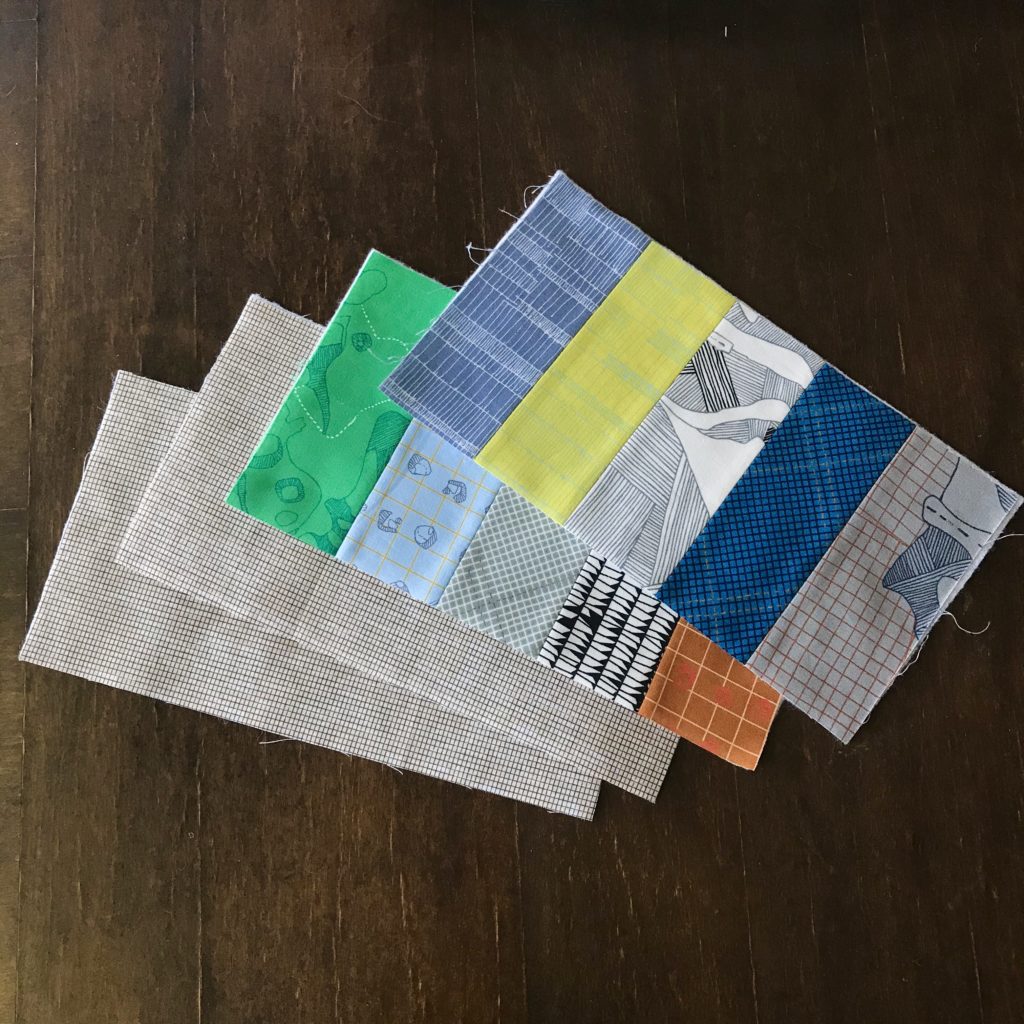
(2) 5.5″ x 10.5″ outer fabric (or pieced panels like mine)
(2) 5.5″ x 10.5″ lining fabric
(2) approximately 2″ x 7″ scraps for pocket
(2) approximately 1.5″ x 4″ scraps for zipper ends
something for marking! I use a Pilot FriXion pen that is heat erasable
a zipper! I buy 14″ zippers like these and cut them down as needed
IMO fusible fleece is the easiest to work with and gives the best combo of cushion + adhesion, but feel free to experiment with batting!
prep and pocket
Fuse the wrong side of the two outers to the adhesive side of the heavyweight fusible fleece. Fuse the wrong side of the two linings to the adhesive side of the lighter weight fusible fleece.
All fused and squishy!
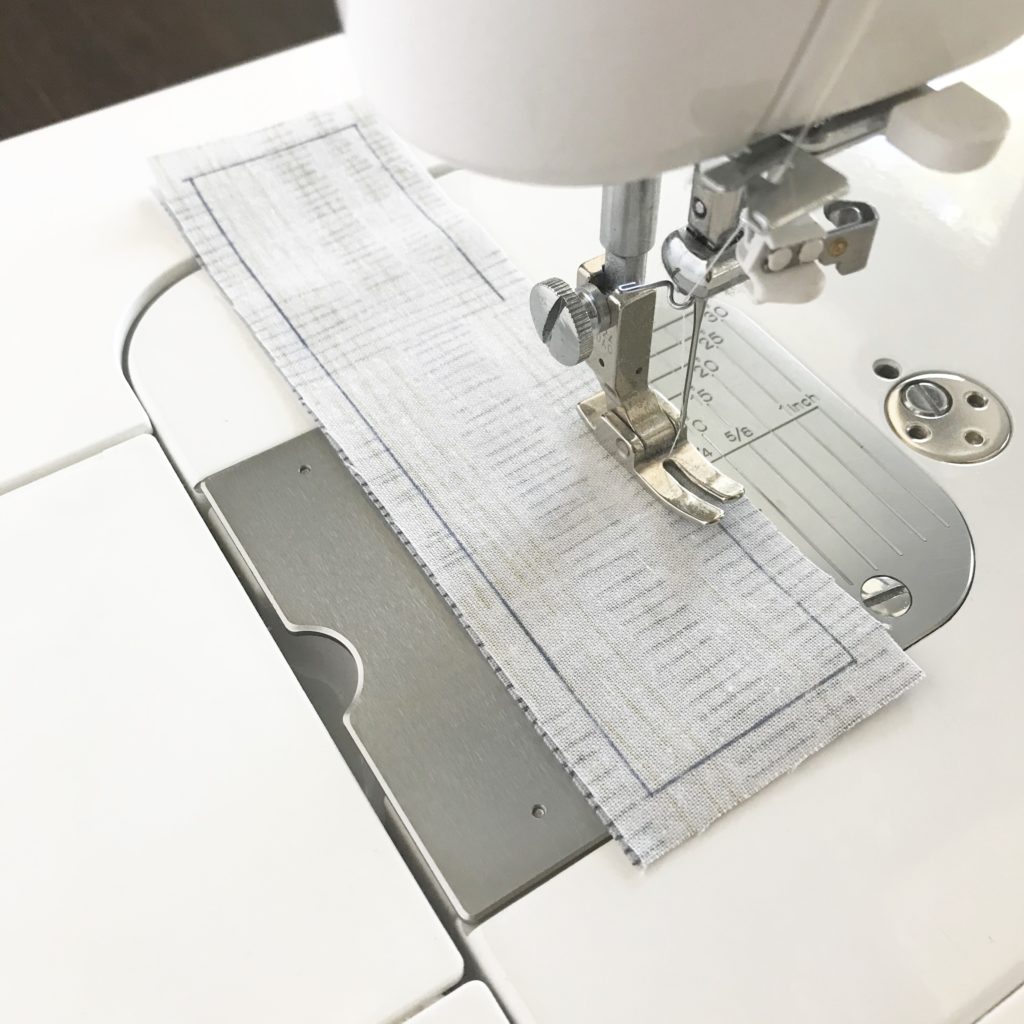
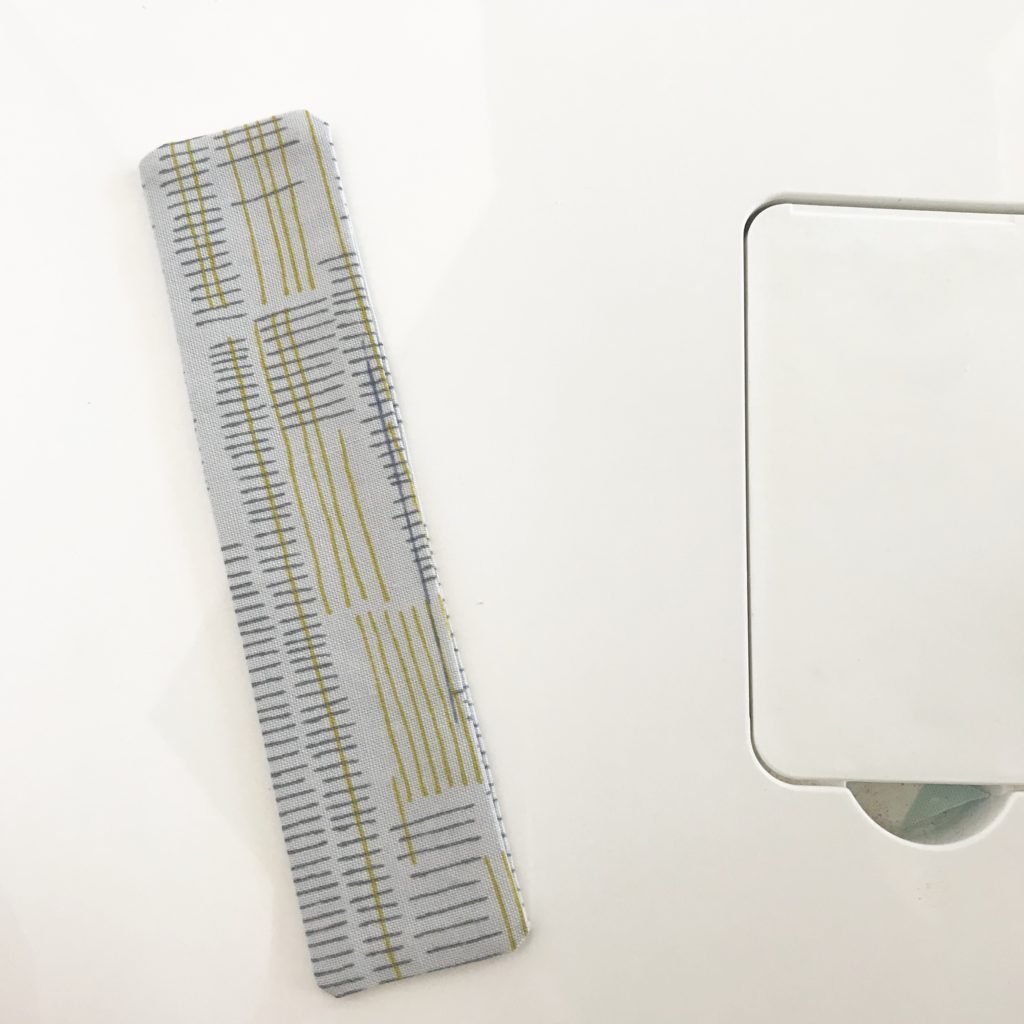
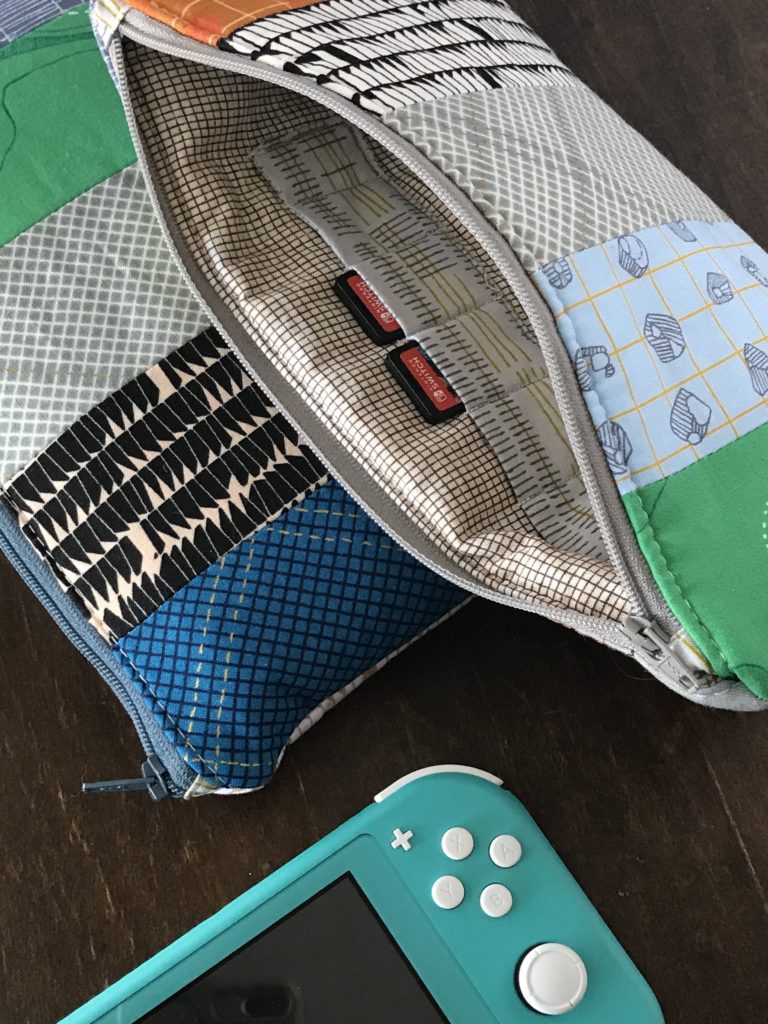
Now it’s time to prepare the pocket. The reason we use two pieces of fabric for making the pocket is the extra thickness at the edges provided by the seam allowances. This will make the top edge of the pocket sturdier for taking games in and out!
Sew pocket pieces RST, leaving a hole to turn.
Trim corners to reduce bulk.
Turn and press.
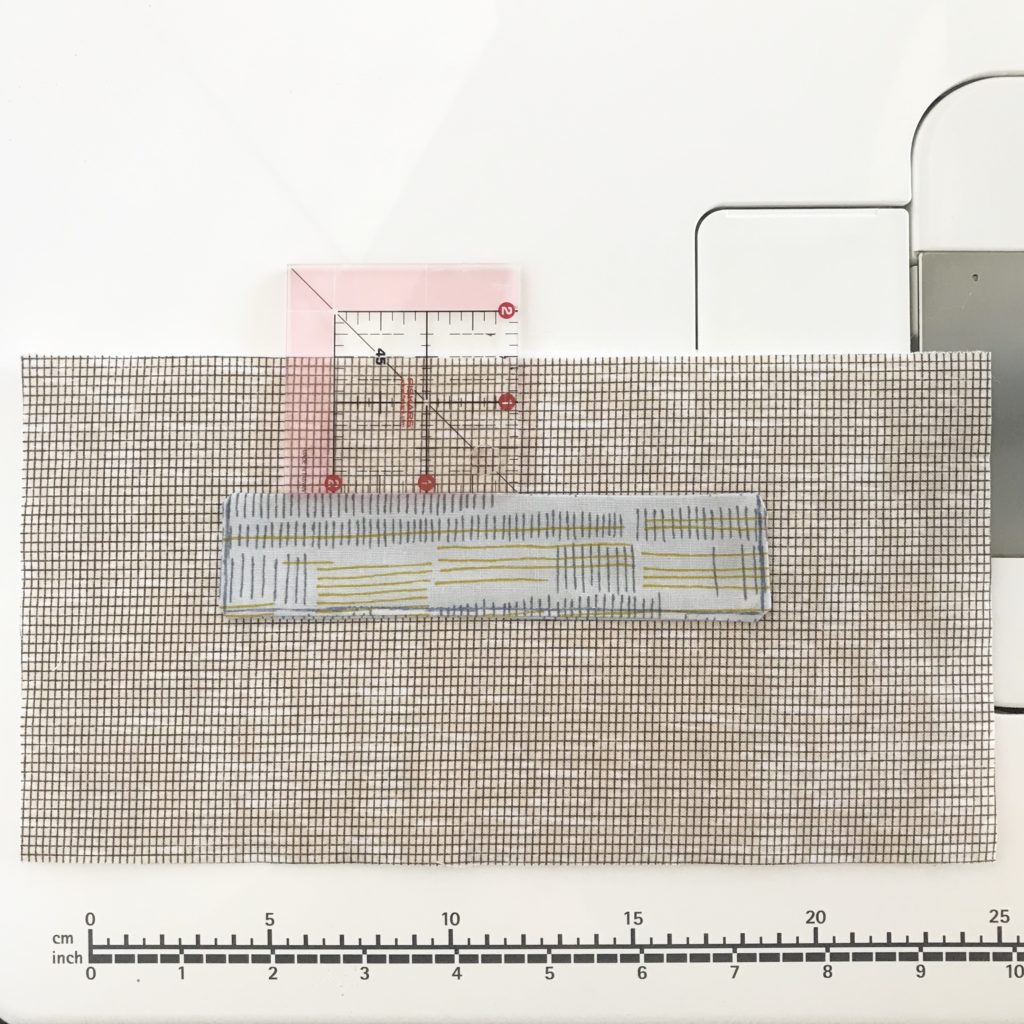
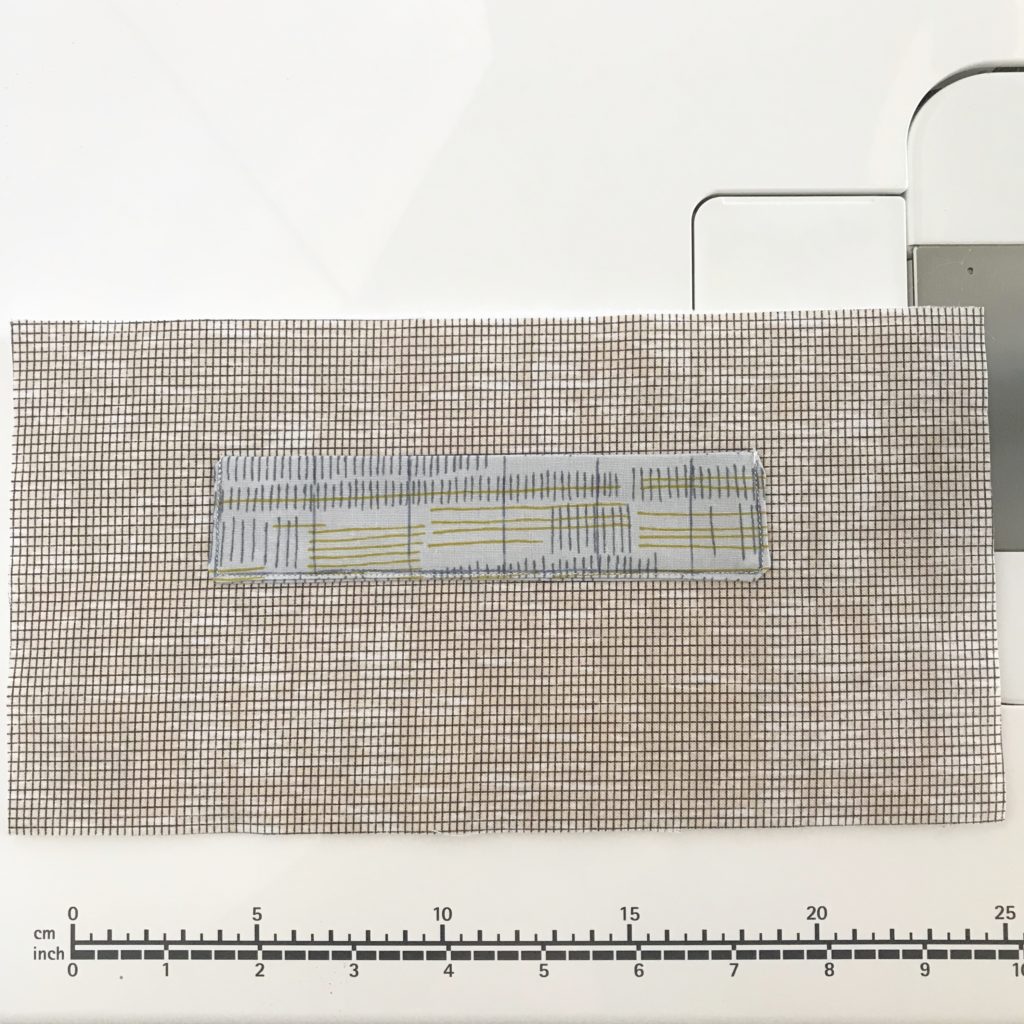
Next we attach the pocket to the lining!
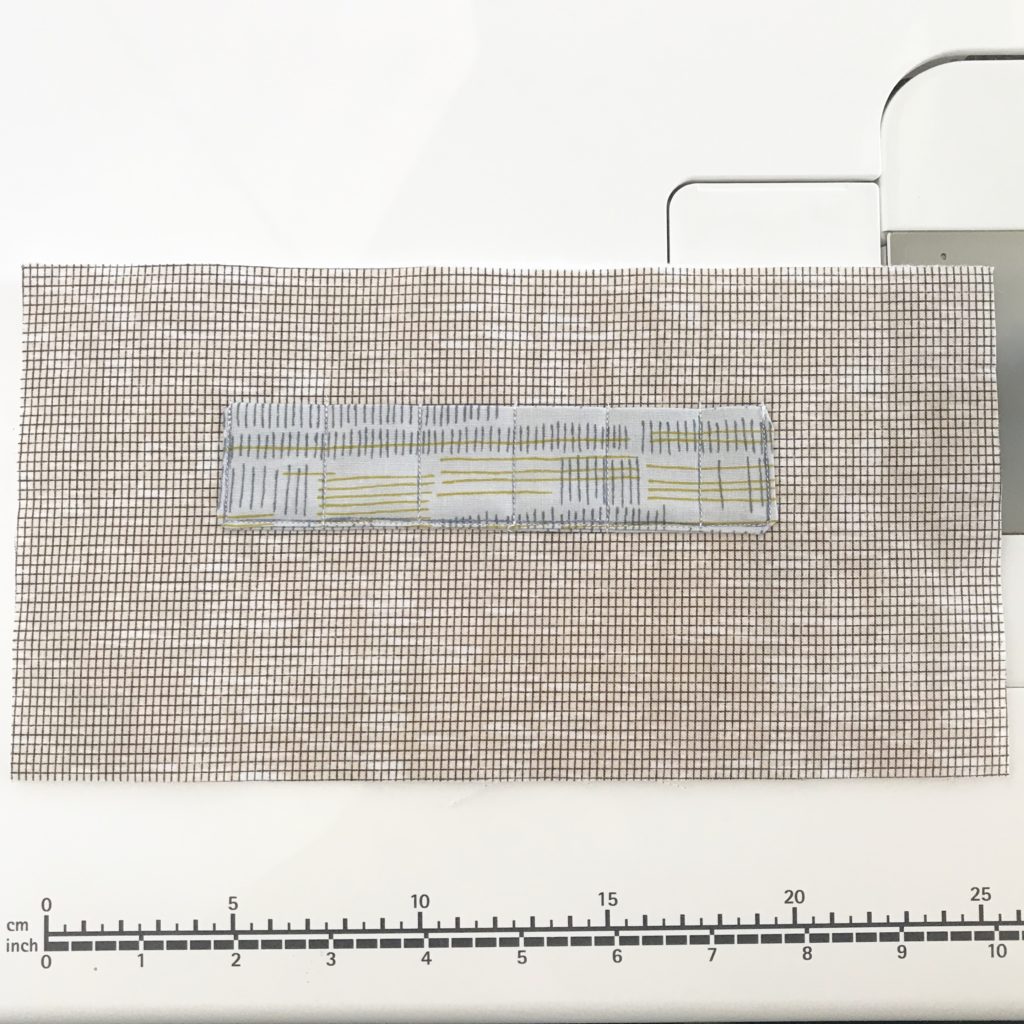
Position pocket 1.5″ inches below top edge of lining. Sew through all layers when you top stitch both sides and the bottom edge (where the line is drawn), to attach pocket to lining. backstitching to secure at the start and finish. Your turning hole will now be secured.Measure your game cards and draw lines for the pockets. I did mine just a hair over 1″ wide which made for a snug fit, keeping the games nicely in place! As you can see my last pocket isn’t big enough for anything, but that’s ok. If that would bother you, you’ll want to be very particular about your pocket width!Sew through all layers on each pocket marking, backstitching well to secure. I suggest testing your first pocket with a game before sewing the rest!
main construction
Great job! Now it’s time to prepare your zipper and assemble your pouch. This is where I send you over to the pro. Jedi Craft Girl’s “My Favorite Zipper Pouch” tutorial is what I always follow for zippered bags with linings!
REMINDER:One key difference between my Switch Lite pouches and her tutorial is that my pouches do NOT have boxed corners, so you can ignore the cutting of a square piece out of each outer and lining panel. Since Switch Lites are pretty flat, our bag doesn’t need that extra step!
all finished
I hope this mini tutorial has been helpful if you’re wanting to make something similar of your own! Sewing with so many layers of padding is a little cumbersome, but totally worth it to protect those pricey gadgets. Happy sewing!
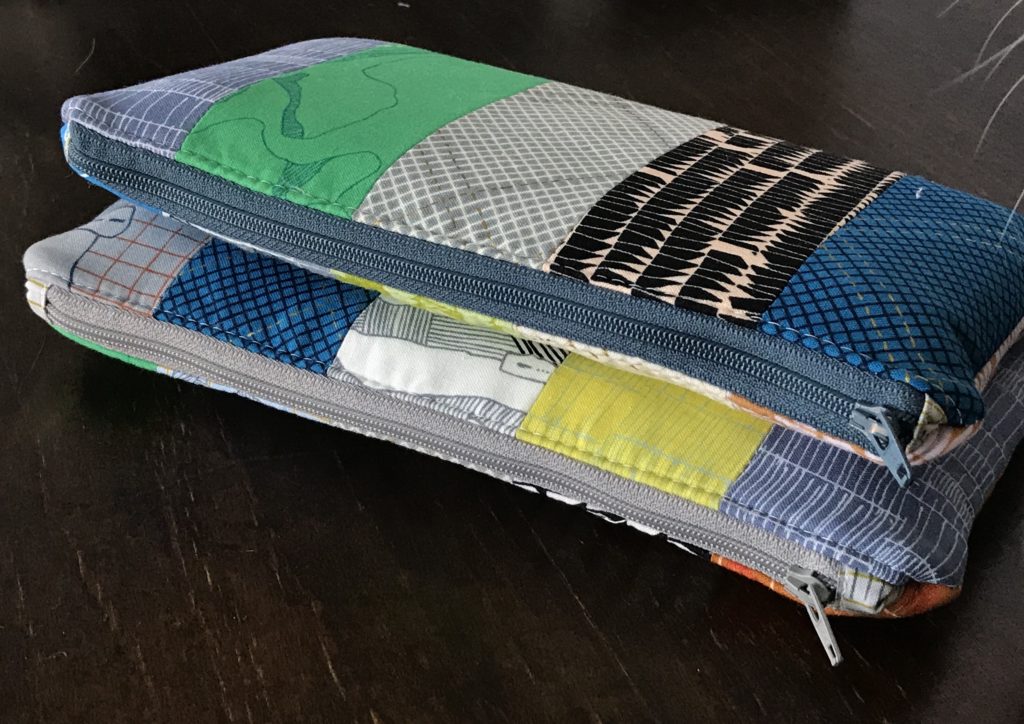
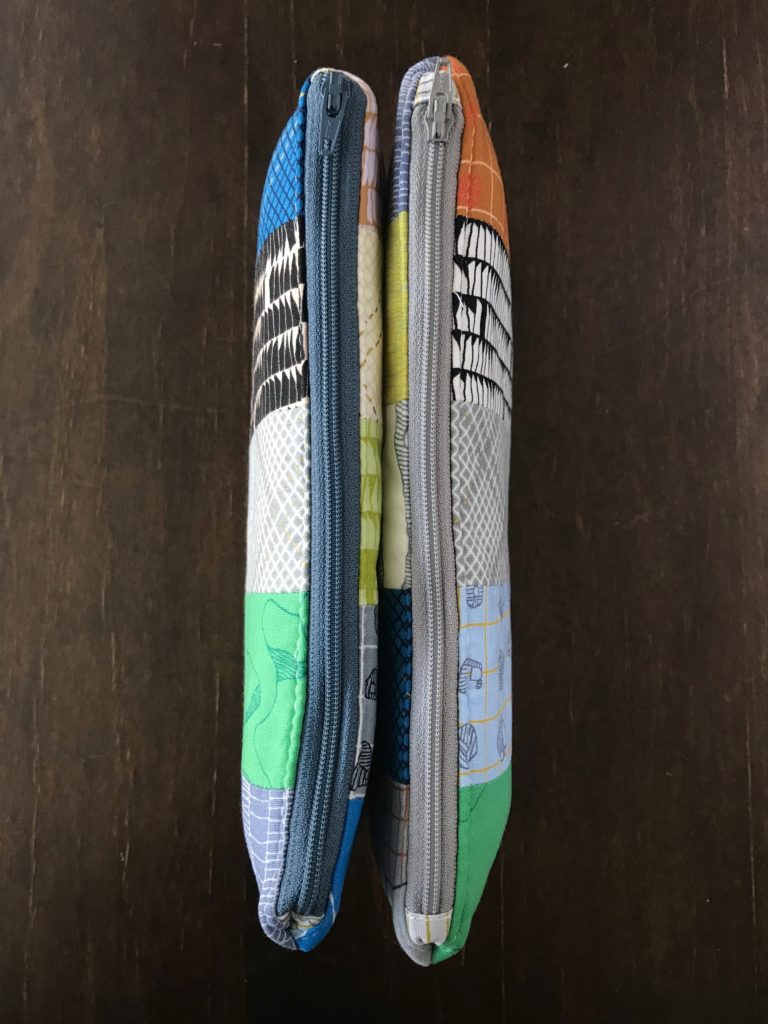
As you can see here, mine are slightly different sizes! The one on the right is the correct size as instructed. (I added a half inch to the width after making the left bag and wanting a smidge more space for taking the Switch Lite in and out.)
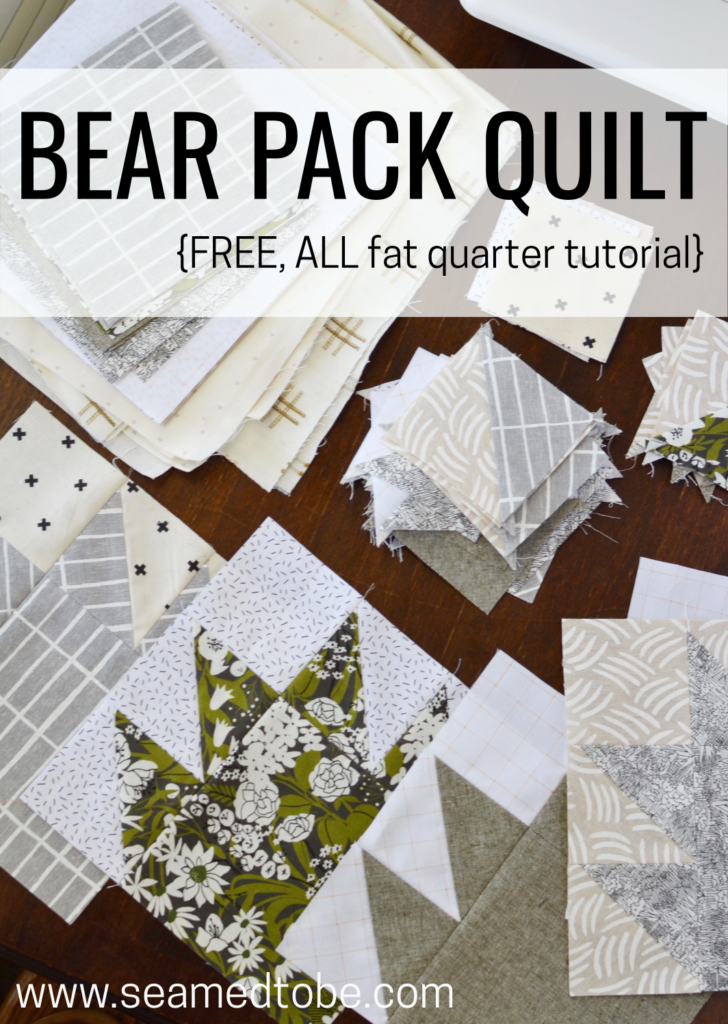
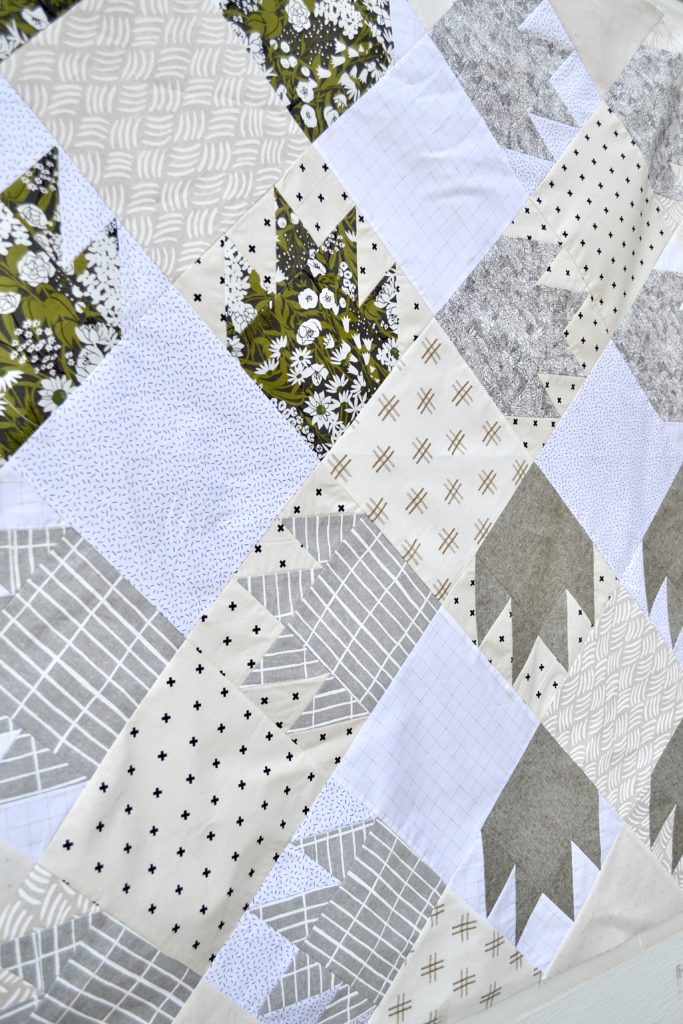
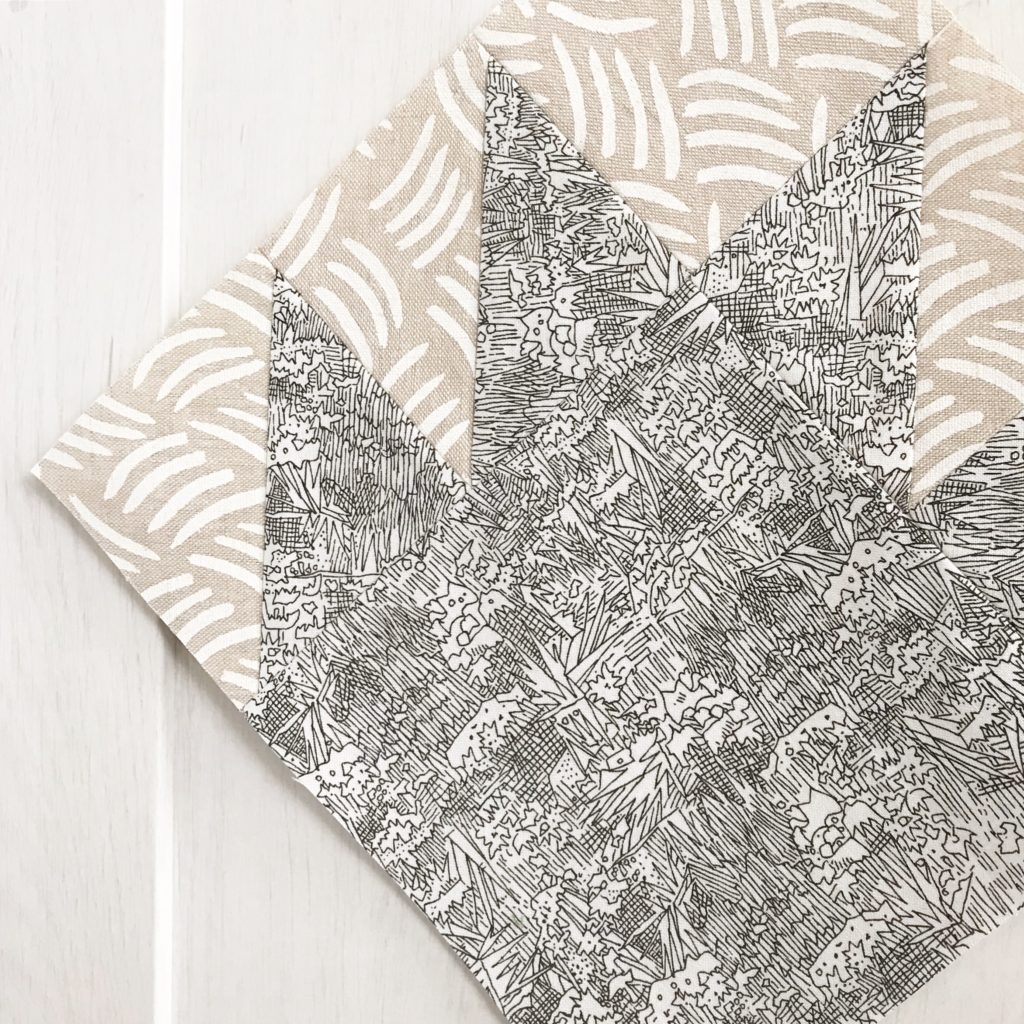
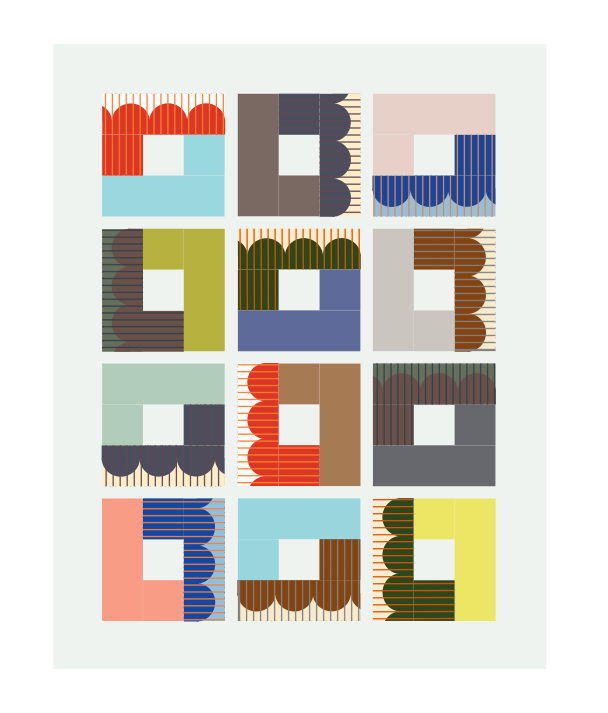
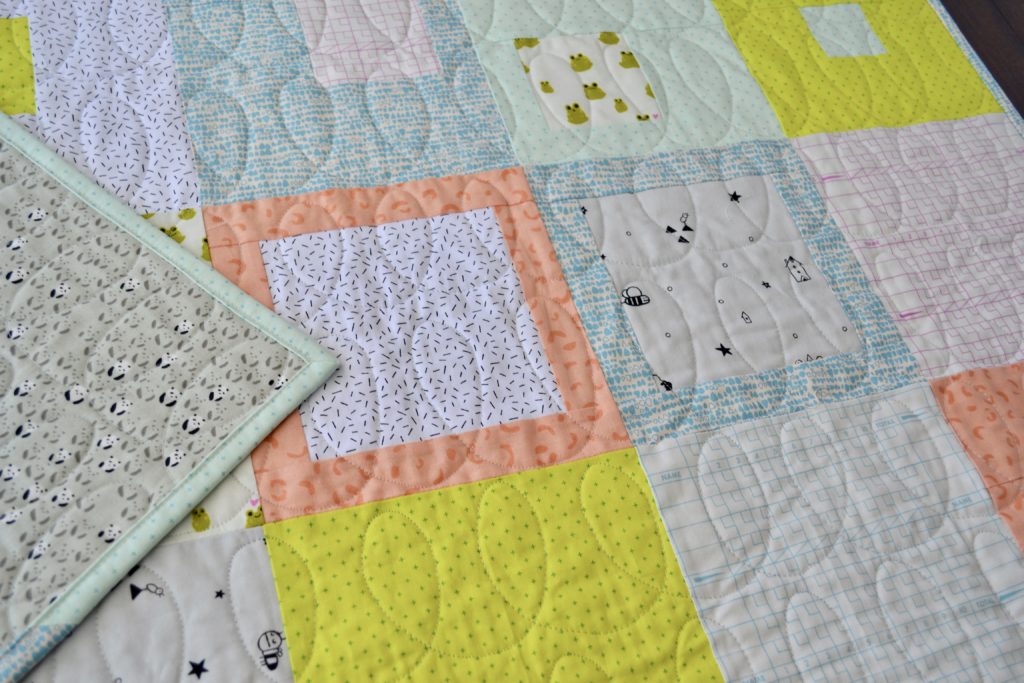
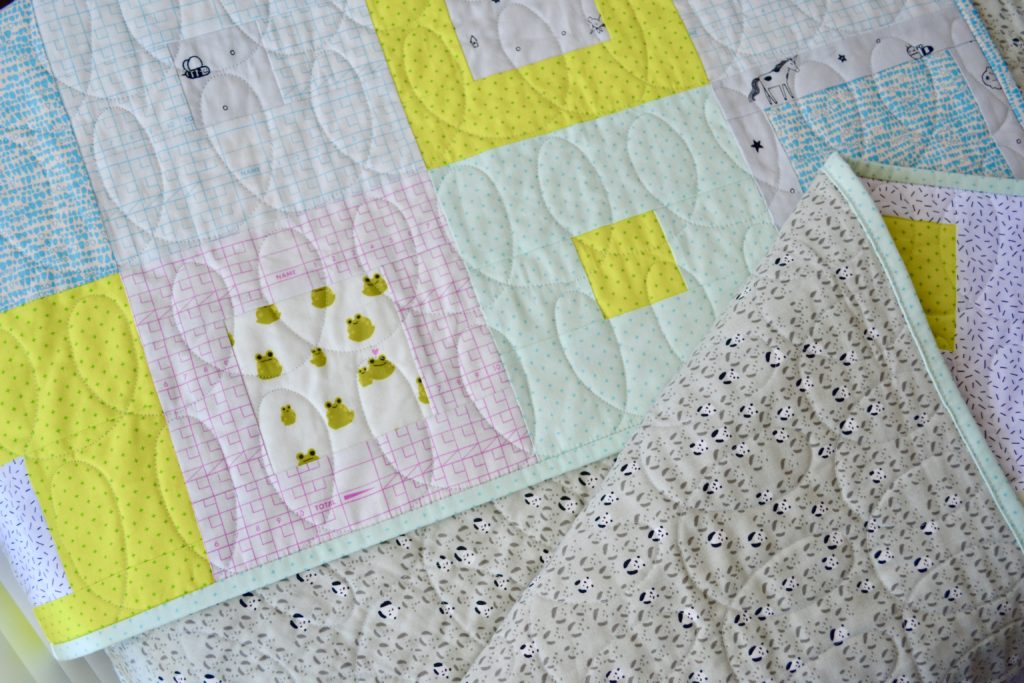
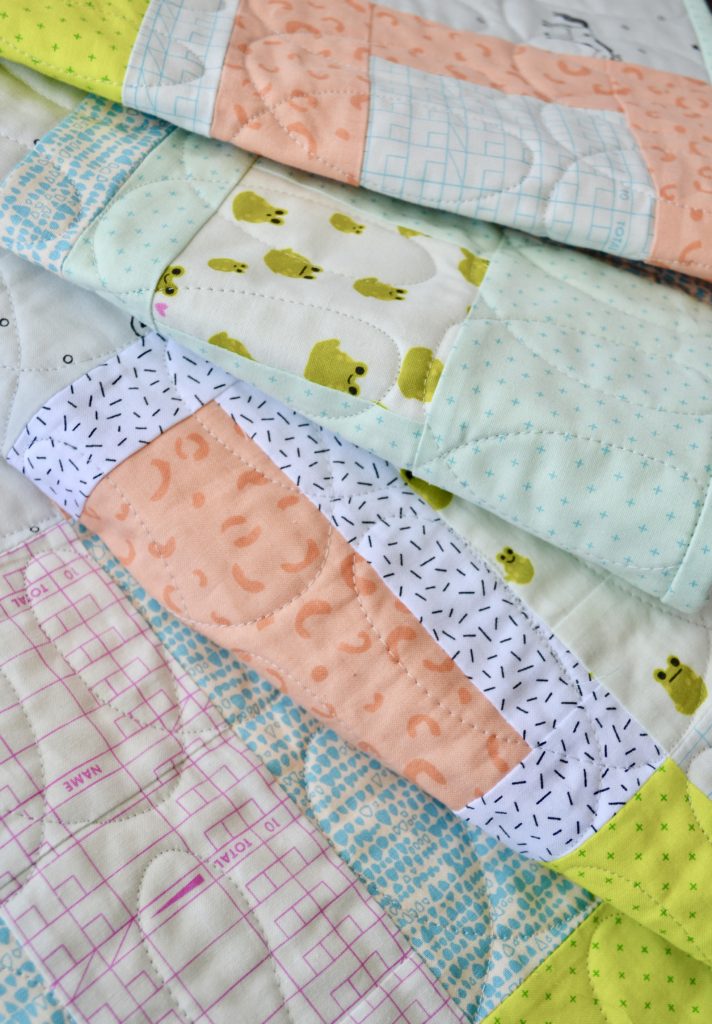
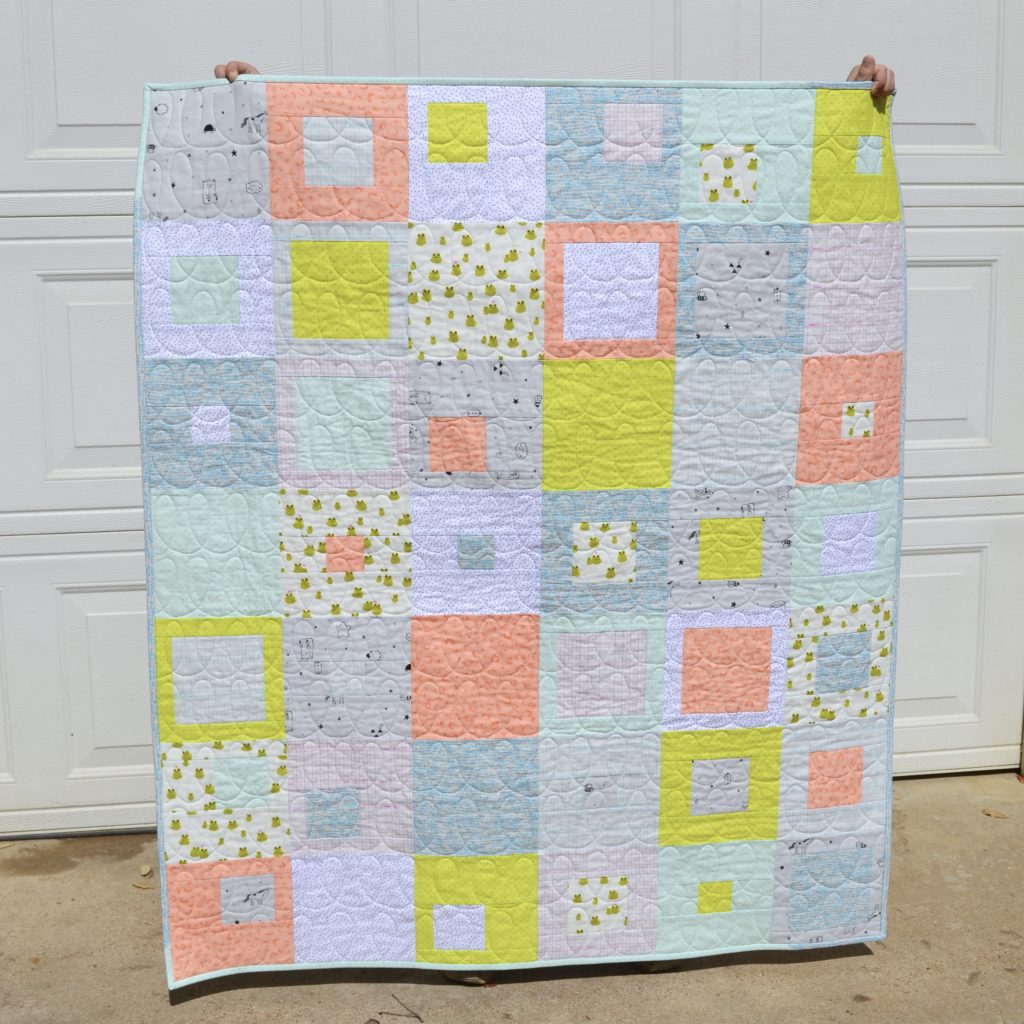
Classic blocks always catch my eye, and the bear paw has been my latest fancy. For a twist on the traditional layout, I have nixed the cornerstones and turned the paws on point, all four facing the same direction! It does seem like a more comfortable way for the poor bear to stand, after all. 😉
The Bear Pack quilt top finishes at about 47″ x 47″, a nice baby or lap size to accent your living room. Simply add a scrappy border if you want it larger!
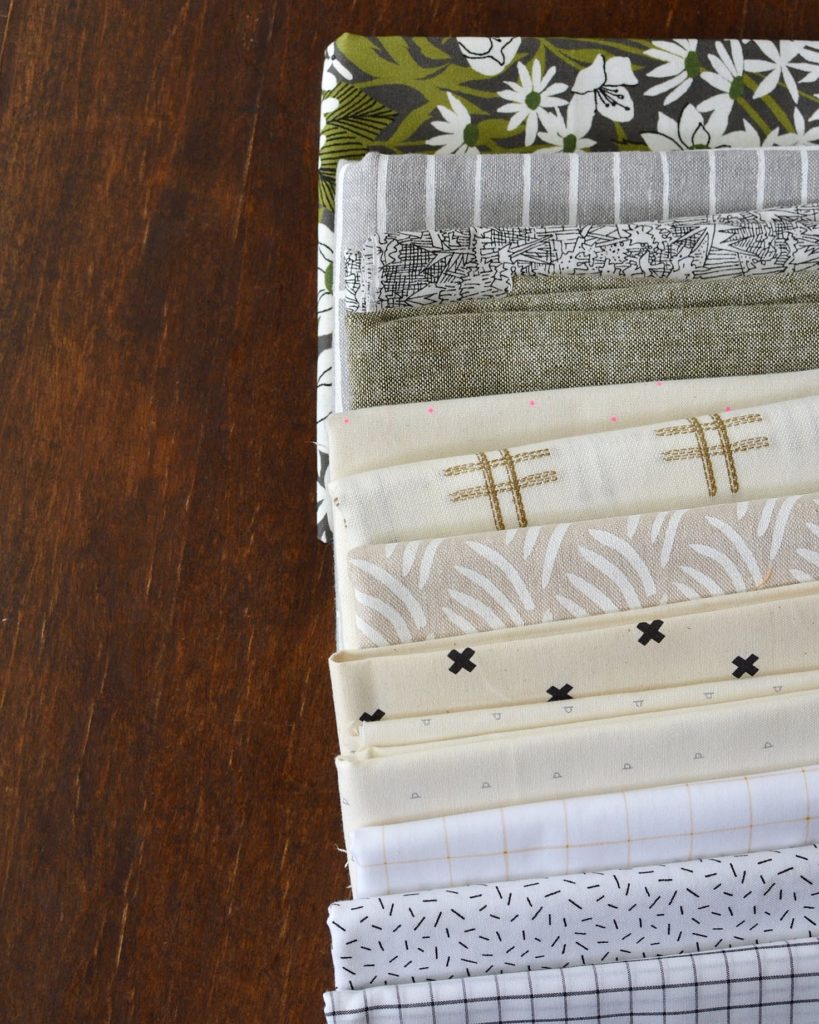
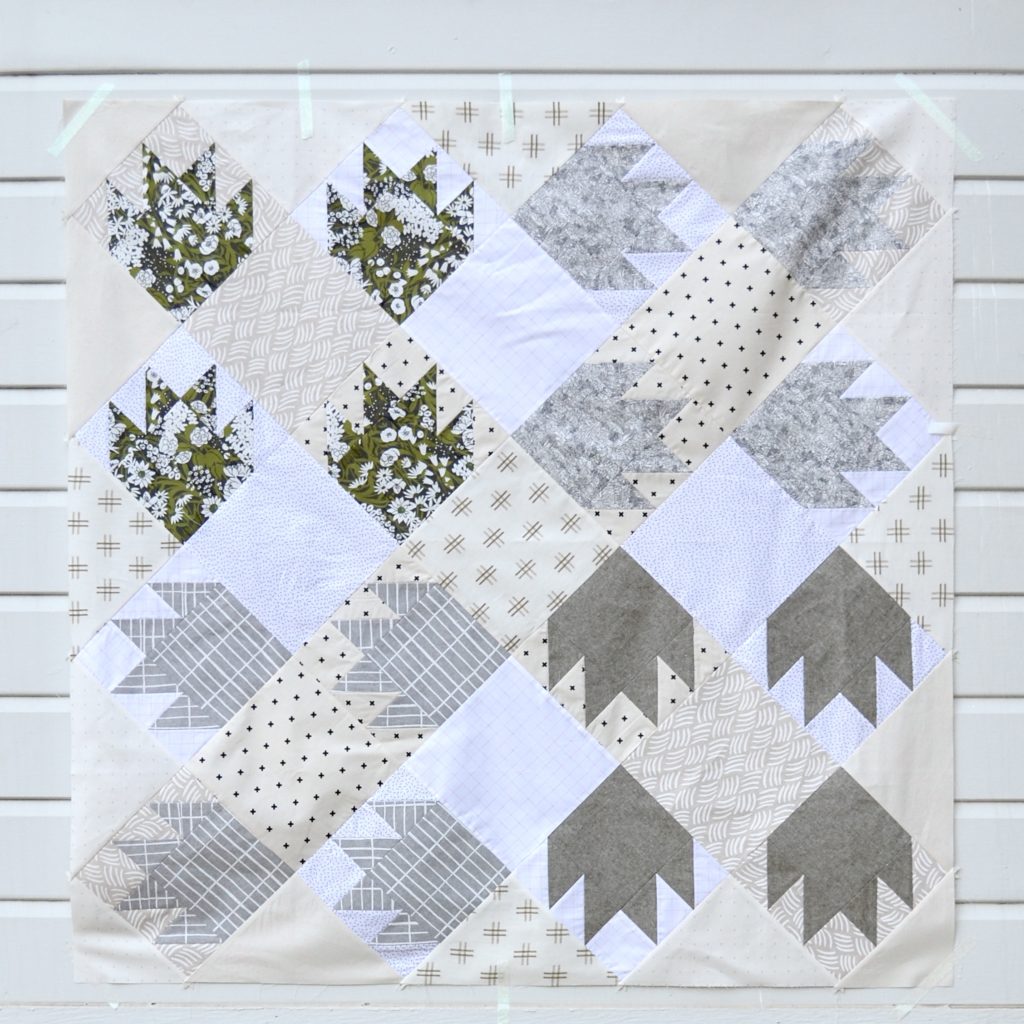
I love, (and often need), to sew from stash so this quilt uses fat quarters for the paws AND the background. My hope that you don’t have to spend another penny on this top! A little tip low volume stash busting tip- if you haven’t started mixing whites and creams yet this is a great time to try it! BE FREE!
FYI: This quilt tutorial is a bit different from the patterns for sale in my Etsy shop. There is no file to download. Below you will find fabric requirements as usual, but a little less guidance and fewer visuals on cutting and assembly. As this tutorial assumes prior knowledge of basic quilt making, I consider this an intermediate project.
FABRIC REQUIREMENTS
4 medium to dark fat quarters for paws
8 light or low volume fat quarters for background blocks and setting triangles
. . . . THAT’S IT! DO NOT PASS GO, DO NOT RUN TO THE FABRIC STORE! (Except for backing, batting, and binding if you need those things for later ;))
PAW PIECES
It’s time to cut! From EACH of your FOUR medium to dark paw FQ’s, cut the following.
(4) 6″ squares (for main paw squares)
(4) 5.5″ squares (for making HSTs)
BACKGROUND PIECES
It really doesn’t matter which of your EIGHT light fat quarters these cuts come from since the quilt has a scrappy look! In case you want to do a bit more planning I have included the description of where the cuts will end up. I recommend starting with the largest cuts to ensure you don’t run out of big enough pieces in your fat quarters!
(3) 12 7/8″ squares (for side setting triangles)
(9) 8.75″ squares (for background)
(2) 6.75″ squares (for corner setting triangles)
(16) 5.5″ squares (for HSTs)
(16) 3.25″ squares (for paw blocks)
MAKING HSTs
We will make these four at a time! Take a 5.5″ square of paw fabric and place it RST with a 5.5″ square of background fabric. Use the common method shown below to create four half square triangles. Press seams open and trim them to 3.25″.
Dashed lines are for sewing, and solid lines are for cutting!
For each of your four paw fabrics, repeat the method shown above four times to create 16 HSTs of each paw fabric. (Four claws per paw!)
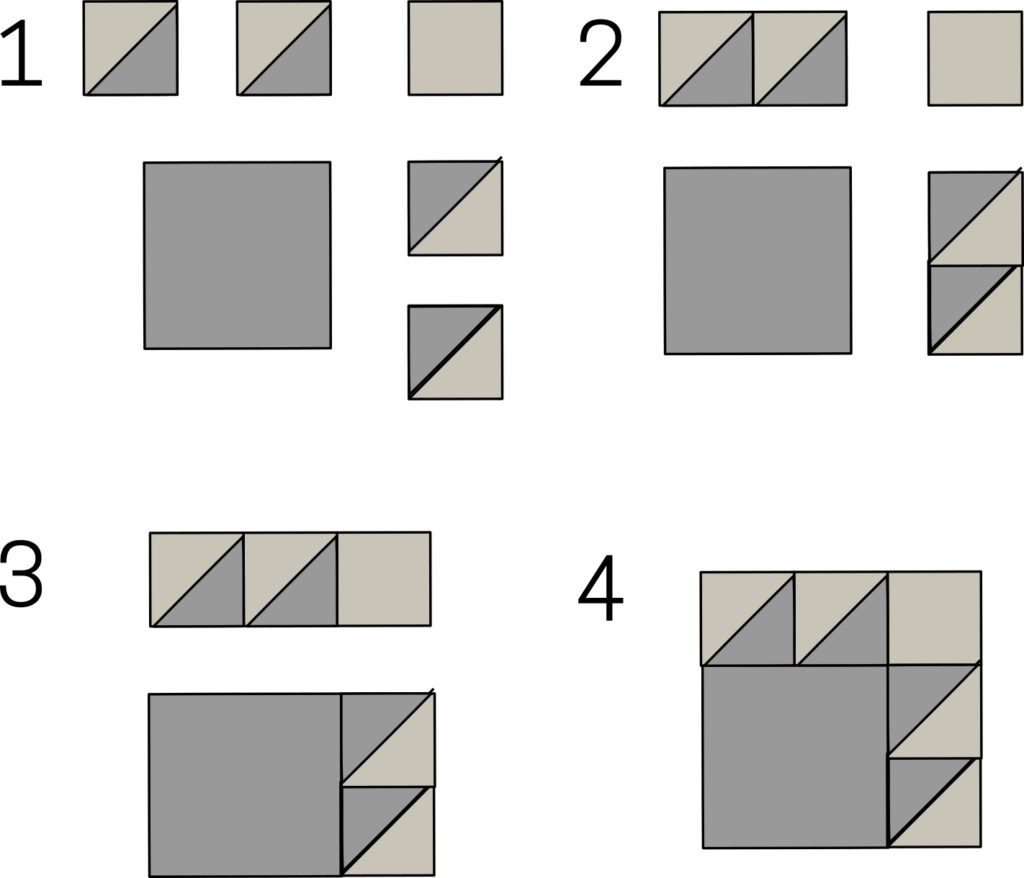
MAKING PAW BLOCKS
Grab a 6″ square of paw fabric, 4 matching HSTs, and one 3.25″ background square. Follow the diagram below for block assembly. Press all seams open!
Repeat this process for all 16 paws on your quilt!
SETTING TRIANGLES
Cut your (2) 6.75″ background squares each in half (from the upper corner to opposite lower corner) to yield 4 corner setting triangles.
Cut your (3) 12 7/8″ background squares each in fours (diagonal from corner to corner both ways, forming an X) to yield 12 side setting triangles.
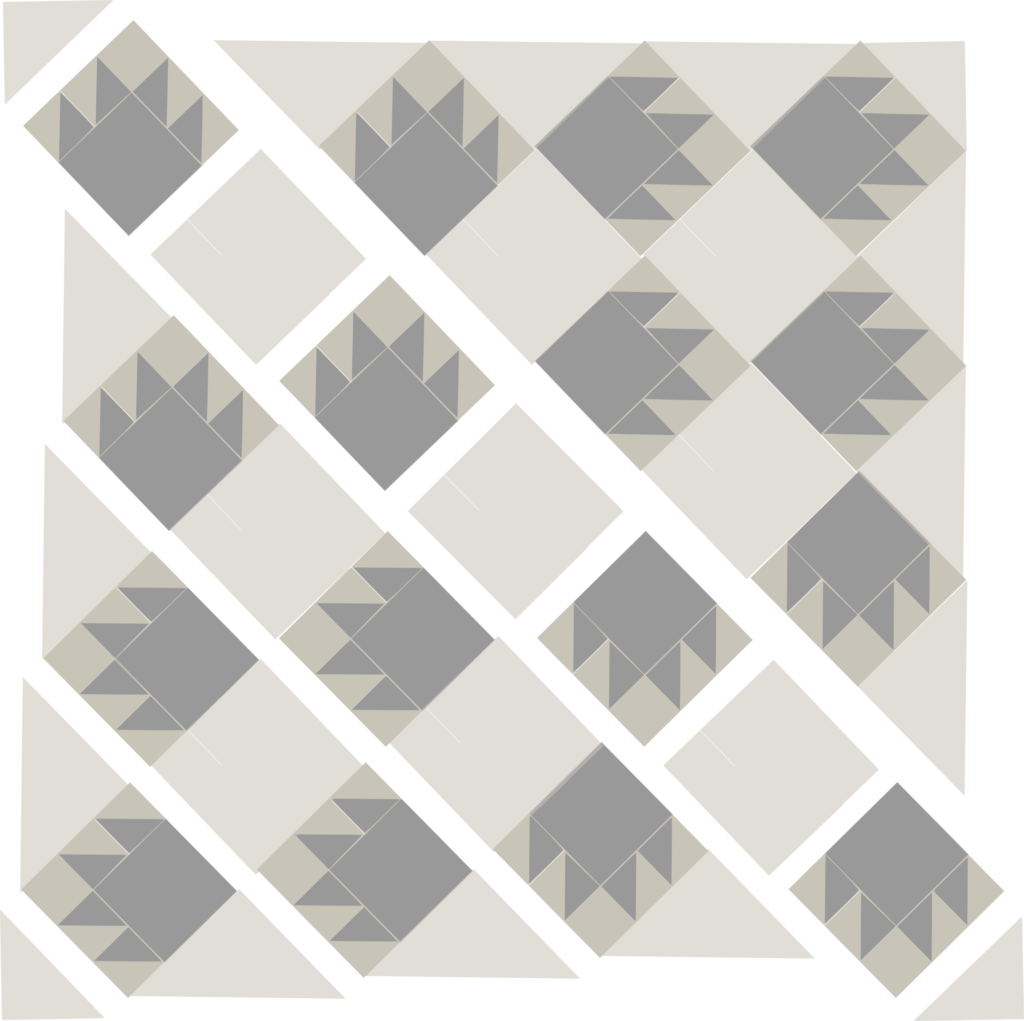
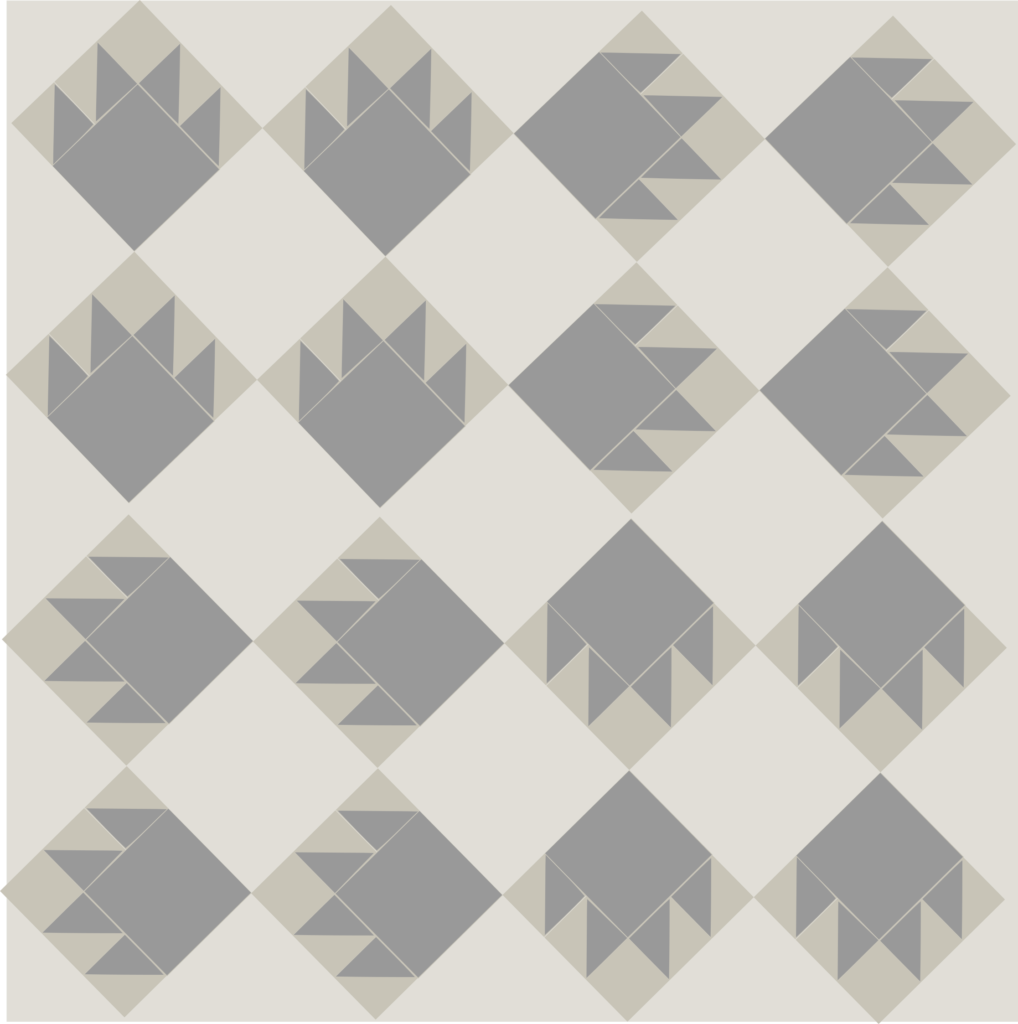
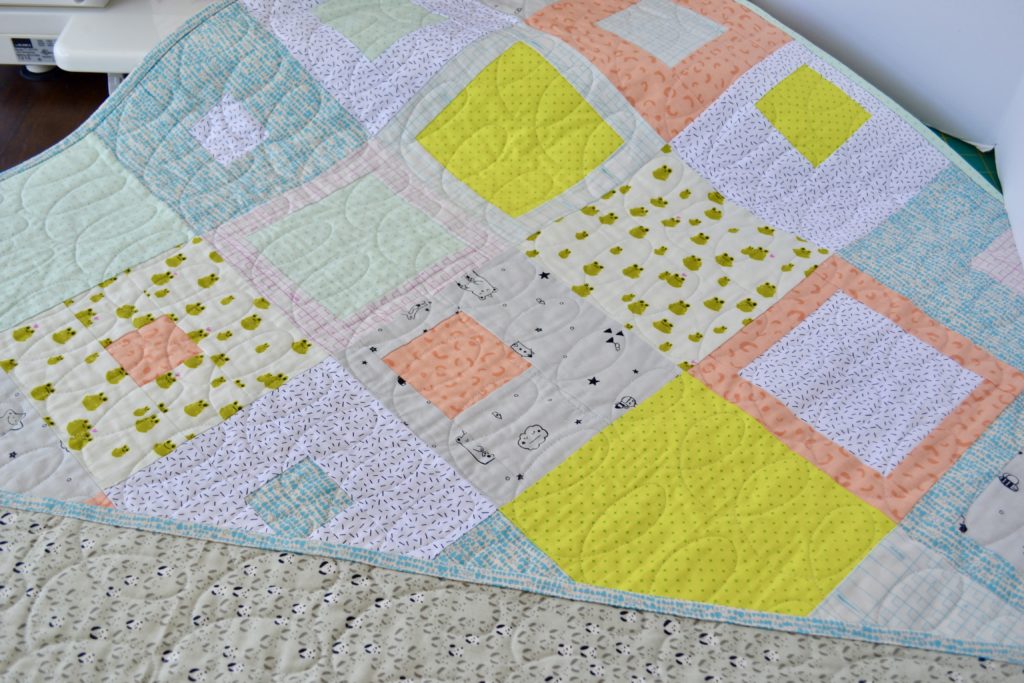
LAYOUT
Use the layout diagrams below to guide the assembly of your quilt. Press seams toward the background blocks and setting triangles for easy nesting of your rows.
The straight of grain edges of your setting triangles will be on the outer edge of the quilt to keep it nice and stable. The bias edges will be pieced with your blocks, so be gentle when sewing and pressing to avoid stretching!
TA DAAA!!! When I took these photos I noticed the quilt stretching and sagging on the tape, but my ankles were being gobbled up by mosquitoes, sooooo. . . here we are! 😉
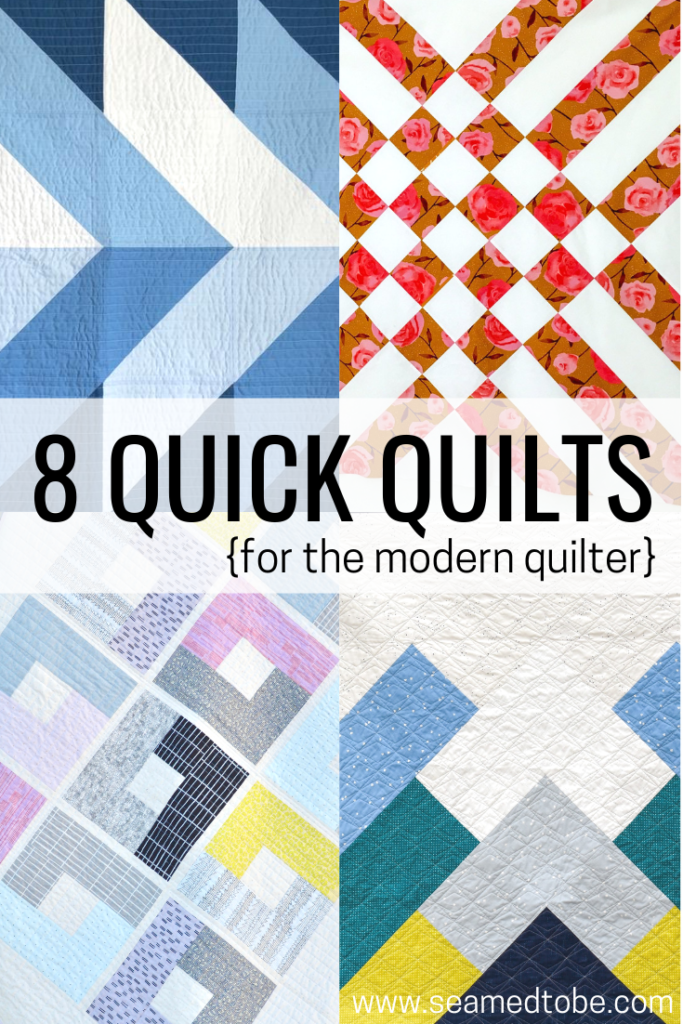
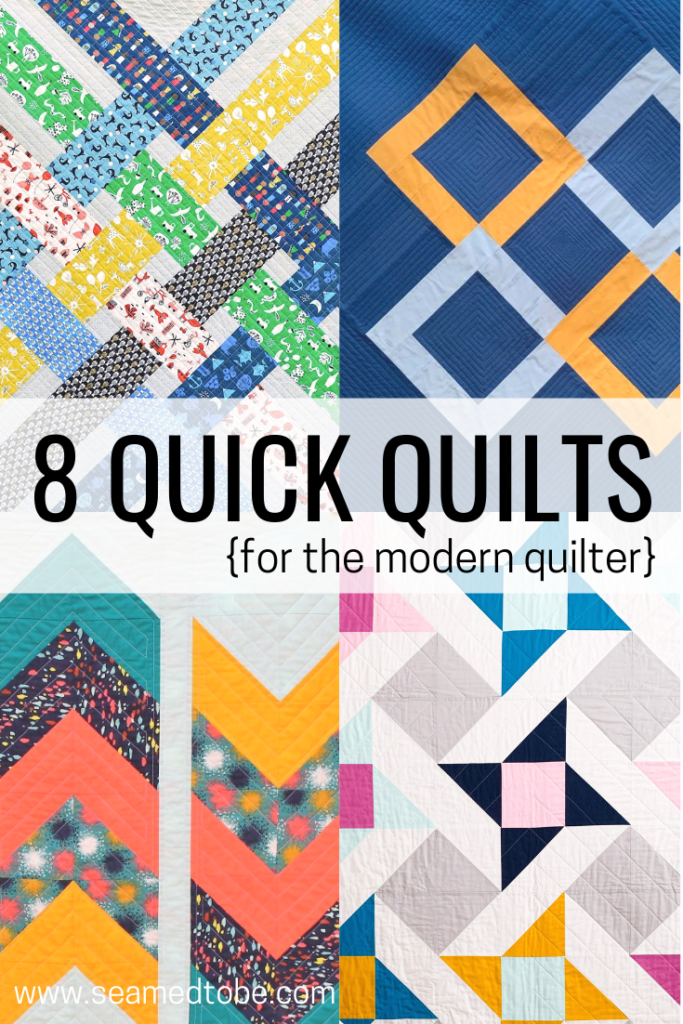
Is time hurtling too quickly toward an occasion you planned on making a quilt for?? This list is for you! Along with being fast and satisfying, many of these patterns are also great for featuring large prints that you don’t want to cut into eleventy billion pieces.
Enjoy this compilation of quick quilt patterns for those times when the baby shower or birthday is sooner than you realized, or as a break from more intricate projects! Each designer has consented to be included in this round up. Patterns linked in bolded headings.
This is my first pattern designed with the beginner quilter in mind. The cutting and sewing go SO quickly, and it has a little skill building built in with the skinny sashing. Pictured are the throw that I use daily on the couch, the twin size top I recently stitched up for my oldest son’s bed, and a bonus mockup with the new Harriot scallop single border prints! Find me on Instagram @seamedtobe
Throw + Twin sizes
Good for large prints, even border prints!
Here you can see how I used the border edge of the bold orange and B&W gleaned prints on the short edges of the rectangles. More border print fun to get your creativity churning! *Harriot prints not to scale in this mockup. From what I can tell without having it in hand, you would get more scallops per rectangle :). Use of a border print in this fashion would require more yardage than the pattern prescribes. Leftovers would make a terrific pieced backing!
This two fabric quilt by Lou is a stunner! Feature your favorite solid of the moment, or a bold print that you can’t get enough of. Find Lou on Instagram @louorthdesigns
Mini + Baby + Lap Sizes
Pick a fabric, any fabric! I can’t think of a combo this wouldn’t be fab in!
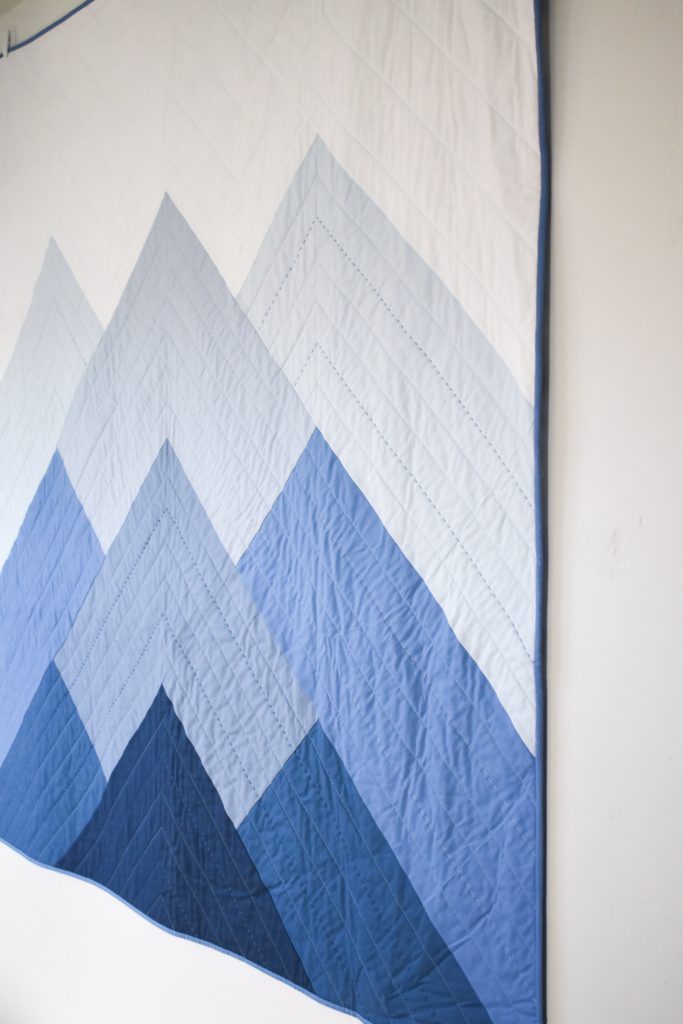
Erin truly has a knack for creating simple designs that pack a punch of visual interest! This pattern is a shining example of that. Find Erin on Instagram @theblanketstatement
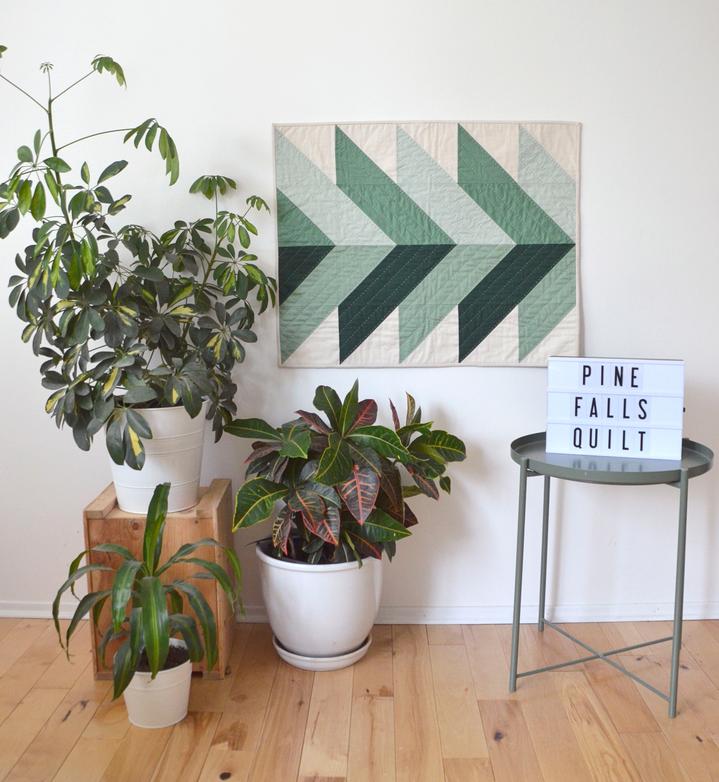
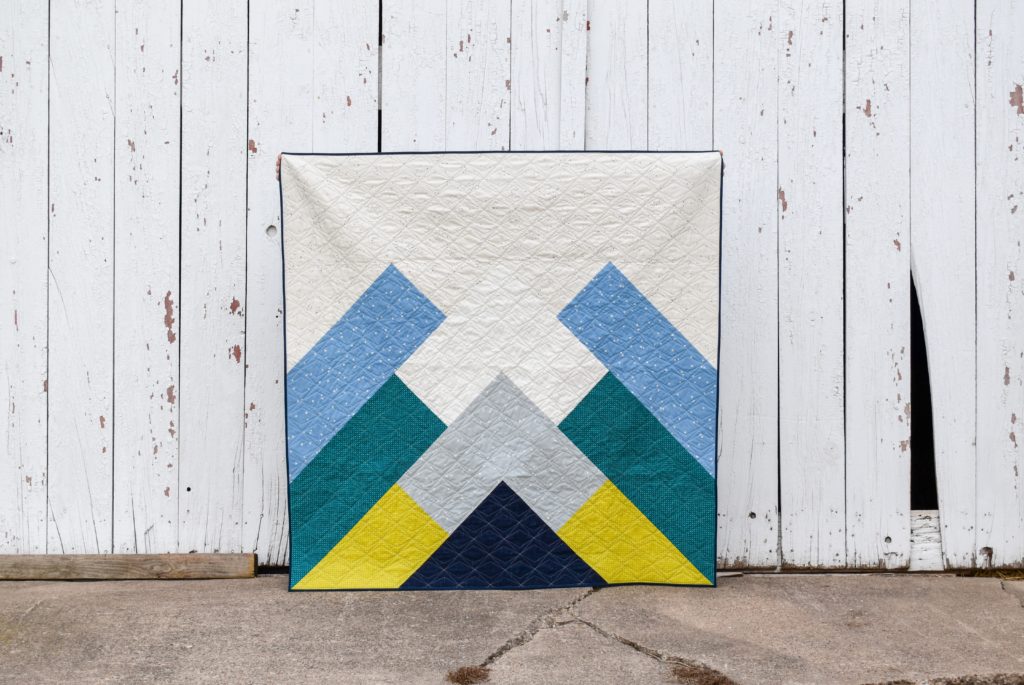
Eliane has terrific range as a creative and I love her chunky, graphic depiction of mountains for this, her second pattern. This would make an amazing easy quilt gift for a nature lover! Find Eliane on Instagram @patchworkandpoodles
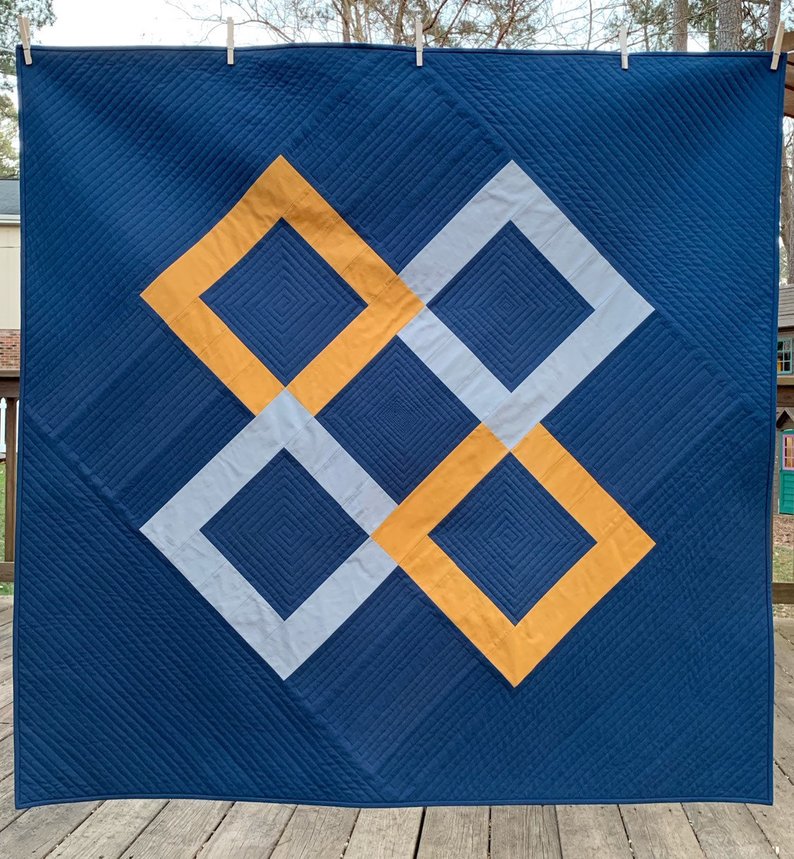
Claire has nailed it with this minimalist diamond design, befitting a sleek and classy living room near you. Can you say housewarming gift?? Find Claire on Instagram @peonyandfern
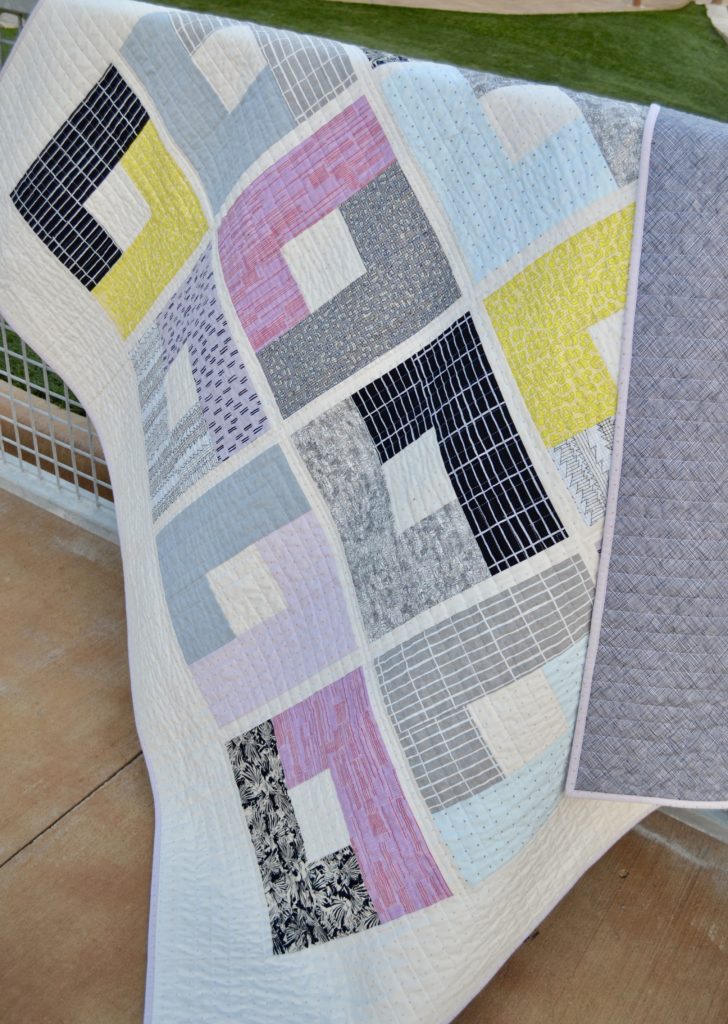
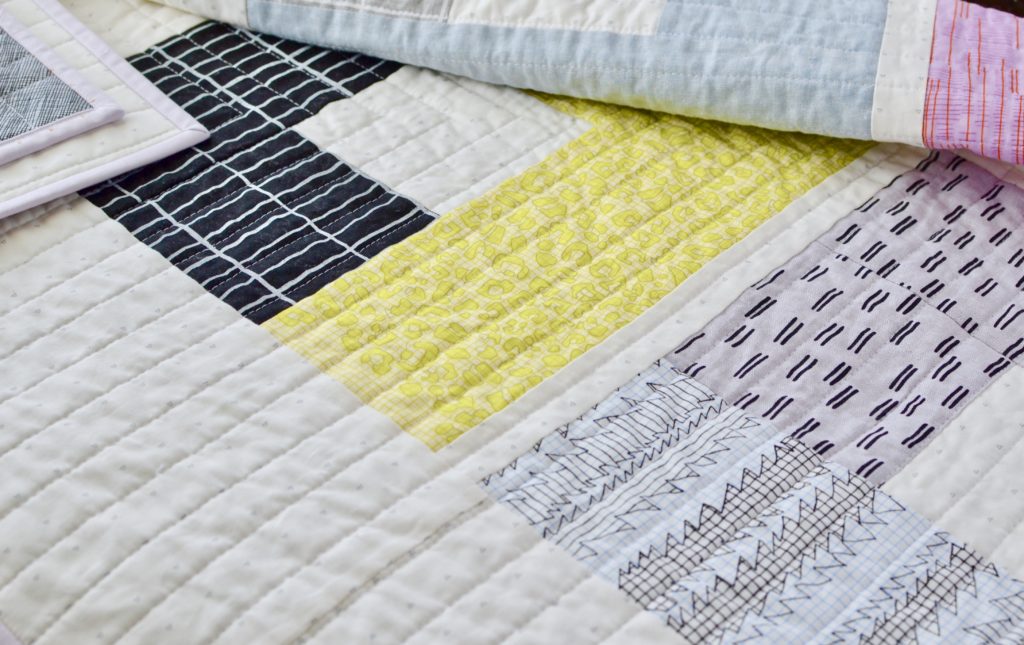
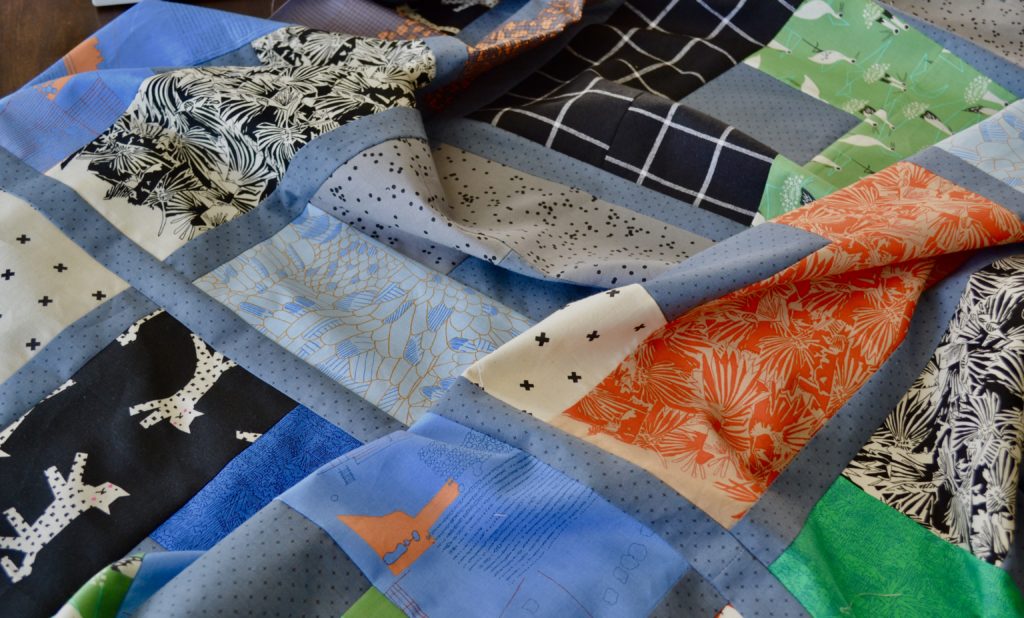
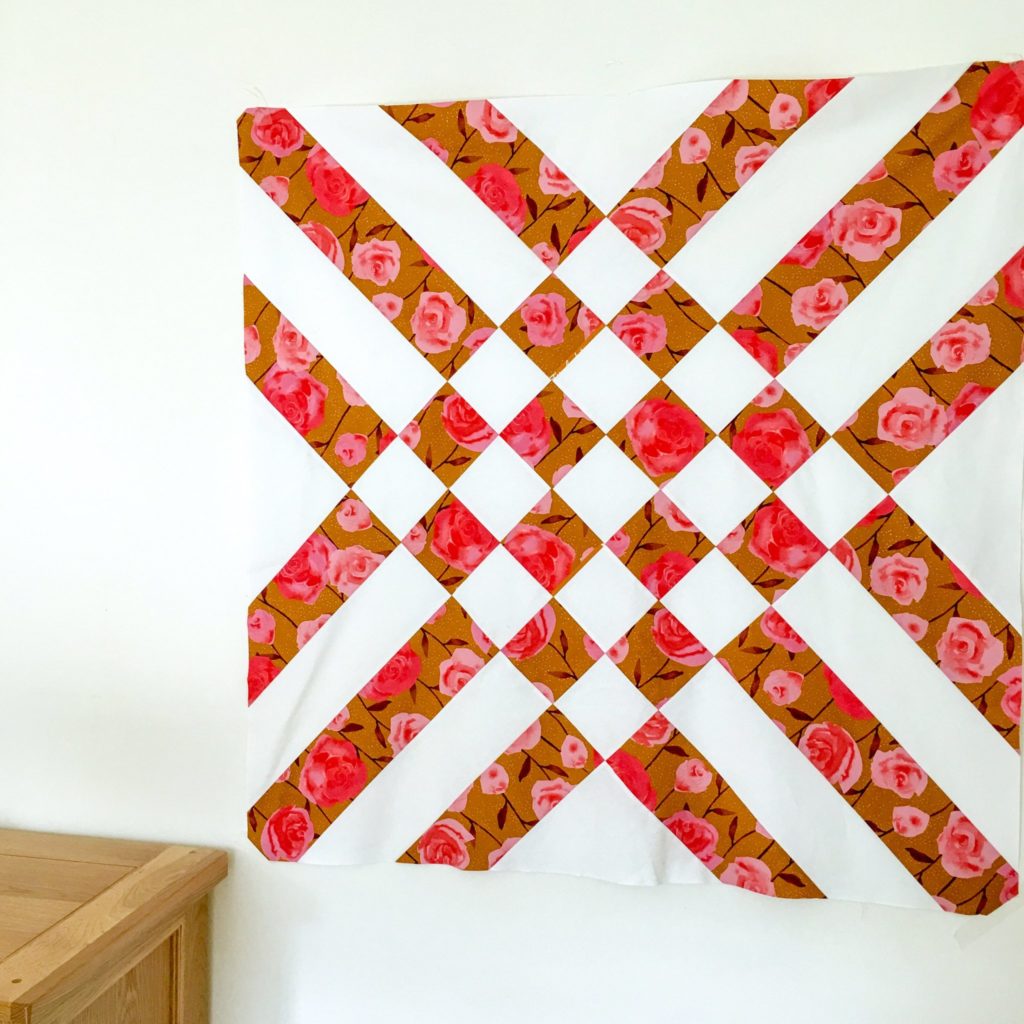
Erica is a prolific pattern designer who has a design for any level of quilter! This take on interwoven strips is one of my favorites. Find Erica on Instagram @kitchentablequilting
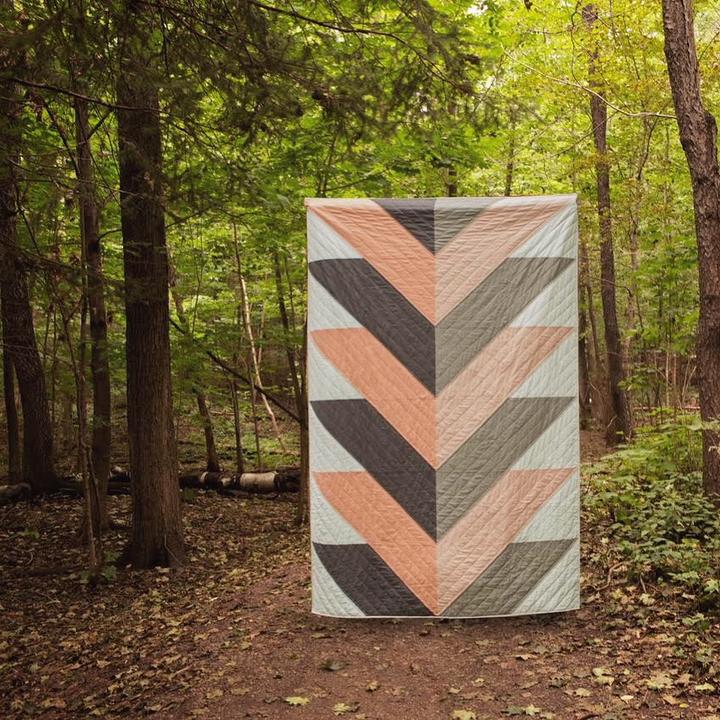
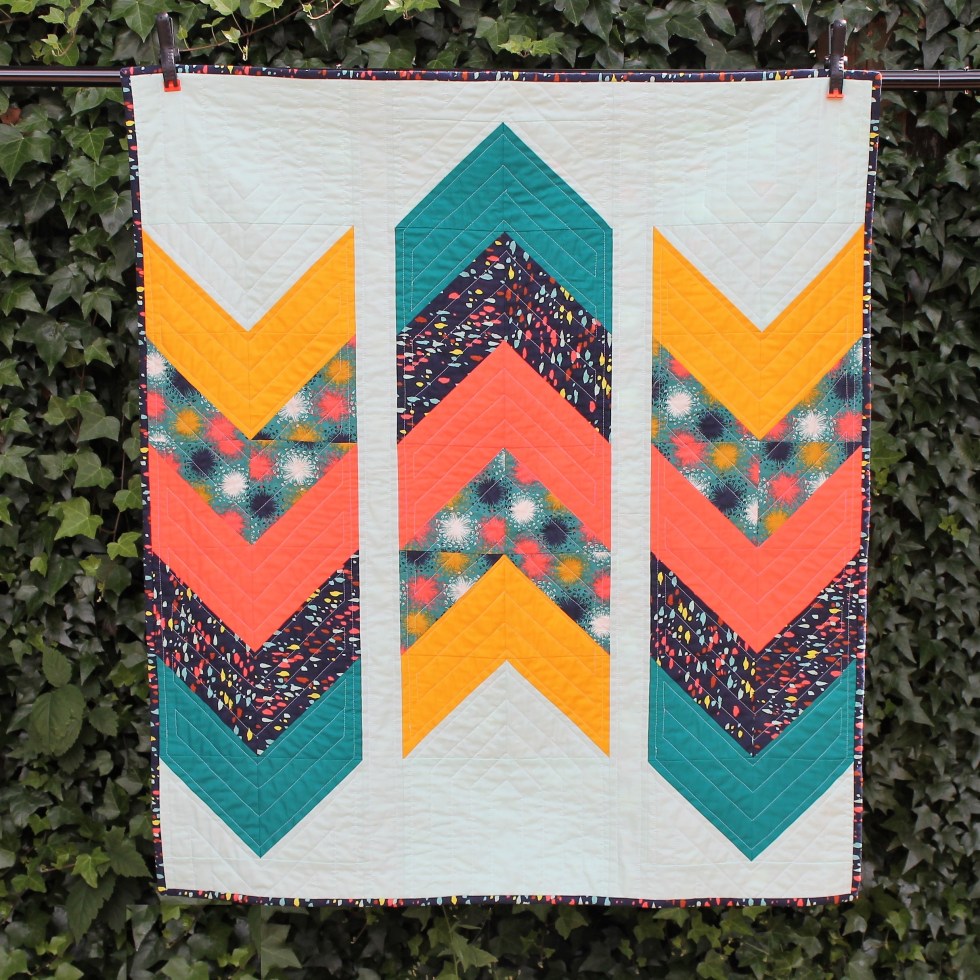
Andrea offers a creative variety of free and paid patterns on her website! I just love the scale and orientation of these arrows and how well they lend themselves to pops of bright color! Find Andrea on Instagram @happycloudcreations
Baby + Throw sizes
Perfect for mixing prints with solids
I hope you’ve enjoyed this round-up of quick patterns and maybe found a new designer or two to check out! All these ladies are so talented and hardworking. Big round of applause to them for their fabulous creativity, and big thanks to you for reading. Happy sewing! -Robin
*If you are brand new to free motion quilting, I suggest watching YouTube videos, taking a class, or seeking out a comprehensive instructional guide online as this is merely a thought dump on FMQ with this particular machine :)*
Free motion quilting on a domestic machine isn’t for the faint of heart. In my experience it requires a lot of practice and stepping out of your comfort zone! Because of all the time you have likely spent preparing to FMQ an entire quilt, it is extra discouraging to have things like skipped stitches and broken threads plaguing your hard work. Also, ripping quilting out is slow and painstaking, so I prefer to avoid it as much as possible!
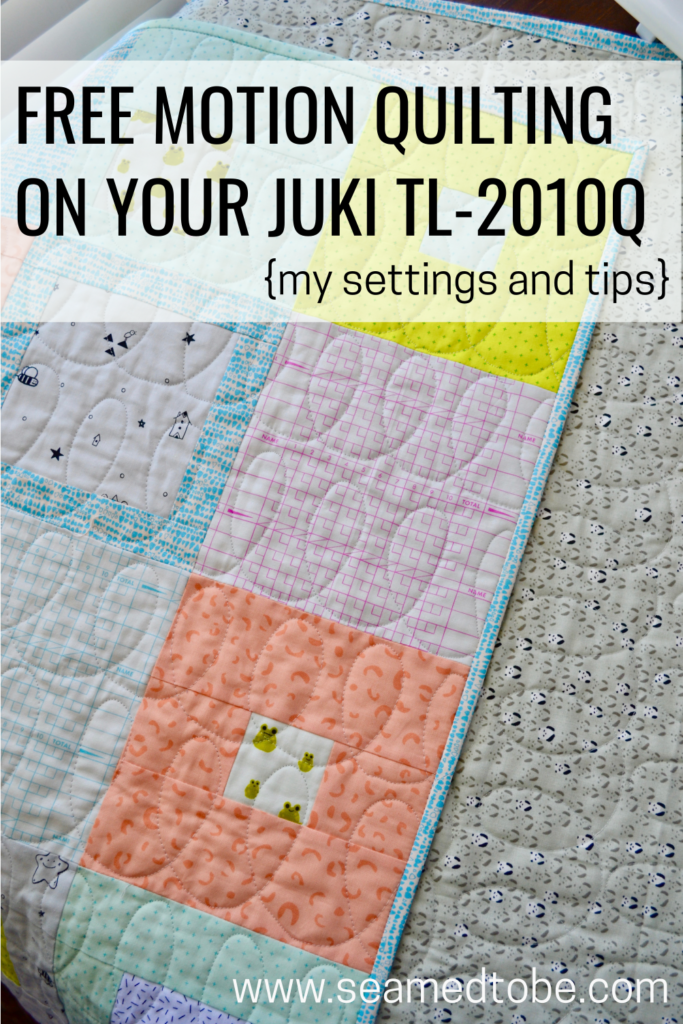
The JUKI TL-2010Q has become a very popular machine in the quilting community, so I thought I would share the machine settings settings that work best for me when FMQing! Of course there is no silver bullet for this with all the variables involved, but perhaps my numbers can give you a few ideas to hone in more quickly on your FMQ sweet spot.
Before thorough troubleshooting, my most frequent FMQ problem had been skipped stitches on designs with smooth curves like hearts, loops, and humps/scallops. I would be stitching right along just fine, but on certain parts of the design, skip one or several stitches in a row. Sometimes it seems to be caused by going over seams, and sometimes by a certain direction of motion in the design. (In my case, curved vertical lines sewn bottom to top, pulling the quilt toward me. This makes sense when you realize this isn’t the direction a sewing machine is “used to” sewing.)
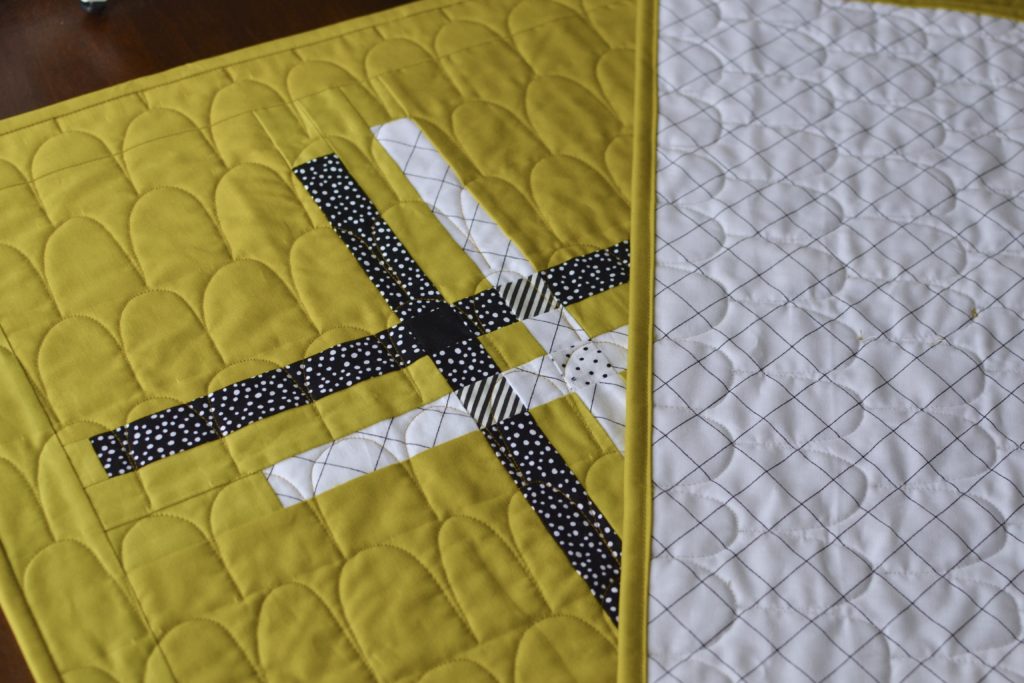
I did a lot of googling for adjustment ideas and after a bit of a trial and error, finally got things running smoothly! I happily finished the hump quilting on my pickle Tuesday Plaid quilt and took a snapshot of all my settings so that the next time I prepared to free motion quilt, I would be able to spend less time troubleshooting settings and more time quilting. A frustration free FMQ session is so satisfying!
Using those prior settings, I was able to dive into quilting loops onto my baby size Tango Quilt after just a few small adjustments. Victory!!
When compared to my normal piecing settings, for free motion quilting my JUKI likes lower top tension and more pressure on the presser foot. Both of these adjustments keep my machine catching the bobbin thread effectively, thus avoiding skipped stitches!
Stitch length: 0
Feed Dogs: DOWN
Presser foot pressure: One notch below the medium dot. See photo!
Thread tension*: 1.0 (front tension dial for the top thread, read with the presser foot down) I know. . . it seems low. My machine wants what it wants!
Speed: I like it a little on the rabbit side of the middle. For piecing I am full speed rabbit, but for FMQ I like to be a little more conservative to prevent accidental rapid/tiny stitches that are impossible to pick out. Whatever speed you pick, consistency is key to match the speed you are moving the quilt with the speed you are stitching.
*If this thread tension setting gives you too “flat” of a bobbin thread on the back of your quilt, the tension should be increased incrementally until you find a perfect balance.
PRESSER FOOT PRESSURE
My Supplies
I do not presume to say these are the “best” supplies for free motion quilting on the JUKI TL-2010Q, but they are what I use with the settings listed!
Aurifil 50wt cotton thread– This thread was recommended to me years ago in my Intro to Quilting class, and I took their word for it! It is the only brand I buy.
Organ Needles 90/14– Lots of these came bundled with my JUKI machine! They work well for me and are so much more affordable than buying needles at a craft store.
FMQ foot: This machine comes with two feet that will work for free motion quilting. I prefer the one that gives me better visibility- the circular outline is thinner! It is referred to HERE as the 1/5 Quilting Foot
My prep
These are steps you may be tempted to skip, especially if you have done them recently. I’m here to say, DO THEM ANYWAY! Set yourself up for success with a clean, oiled, sharp sewing machine so you know whatever blips you encounter are due to technique or settings, not the condition of your gear.
CLEAN IT– Yep, take the plate off and really clean it! Clean the bobbin case too.
OIL IT– This machine requires more frequent oiling than other machines I have had. I like to operate all the bells and whistles and do a little test sewing after oiling to get it moving through the machine. Here is what I use!
CHANGE the needle. Just do it. 🙂
WARM UP– I keep a little quilt sandwich tucked under my extension table so it is easy to grab and do a few test stitches on. A word of warning though –> a small quilted square is much easier to manipulate than a big quilt, so do not get discouraged if you have a harder time on the real thing. That is normal!
Loopty loop
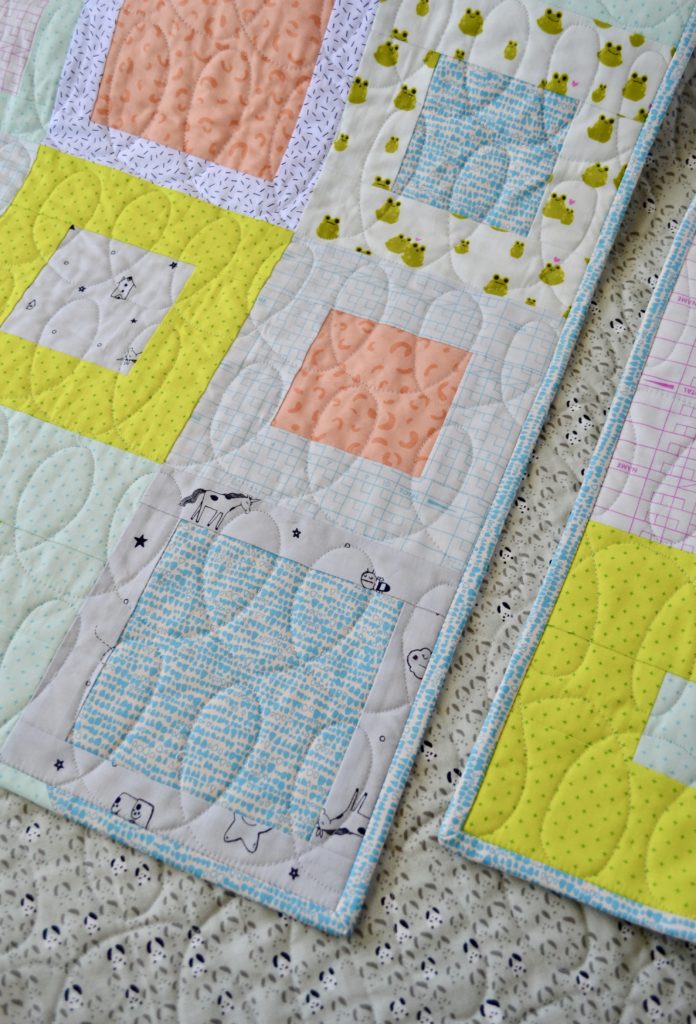
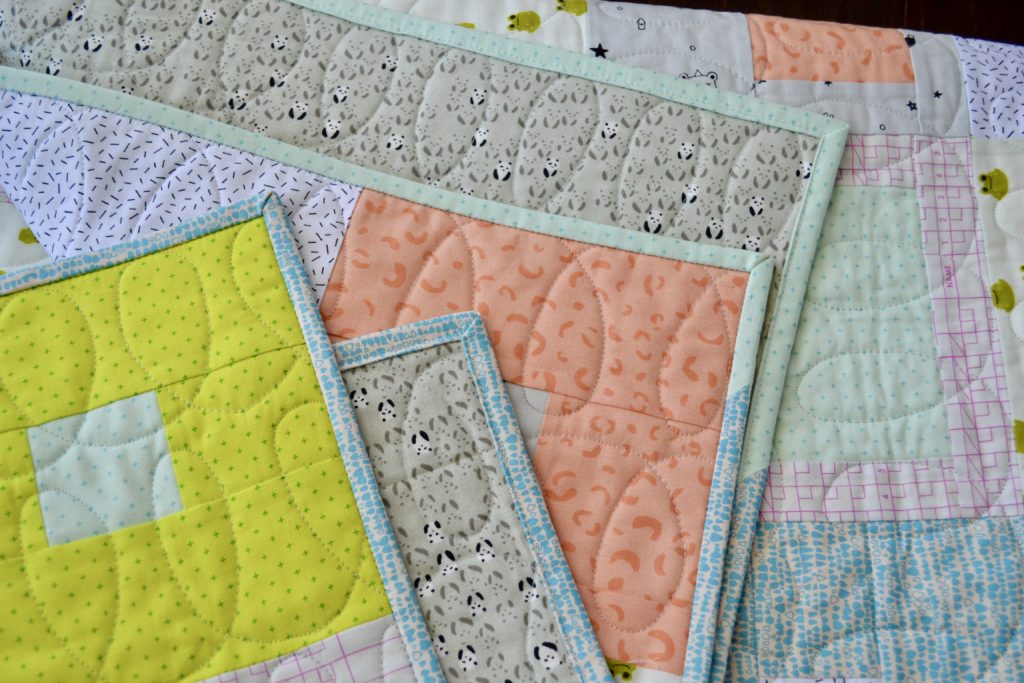
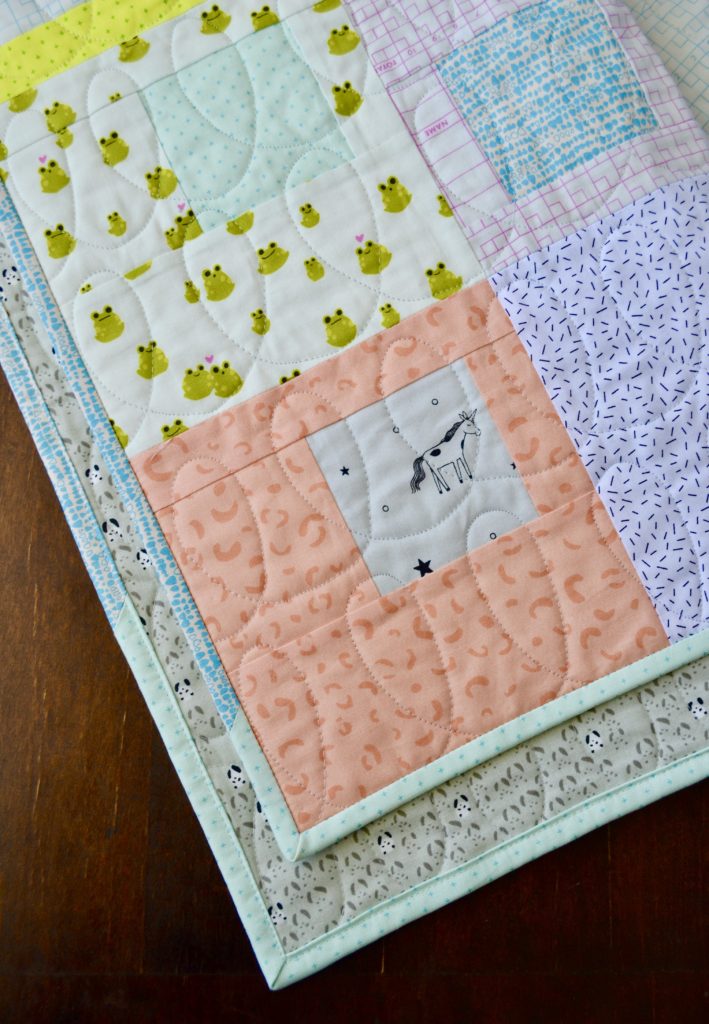
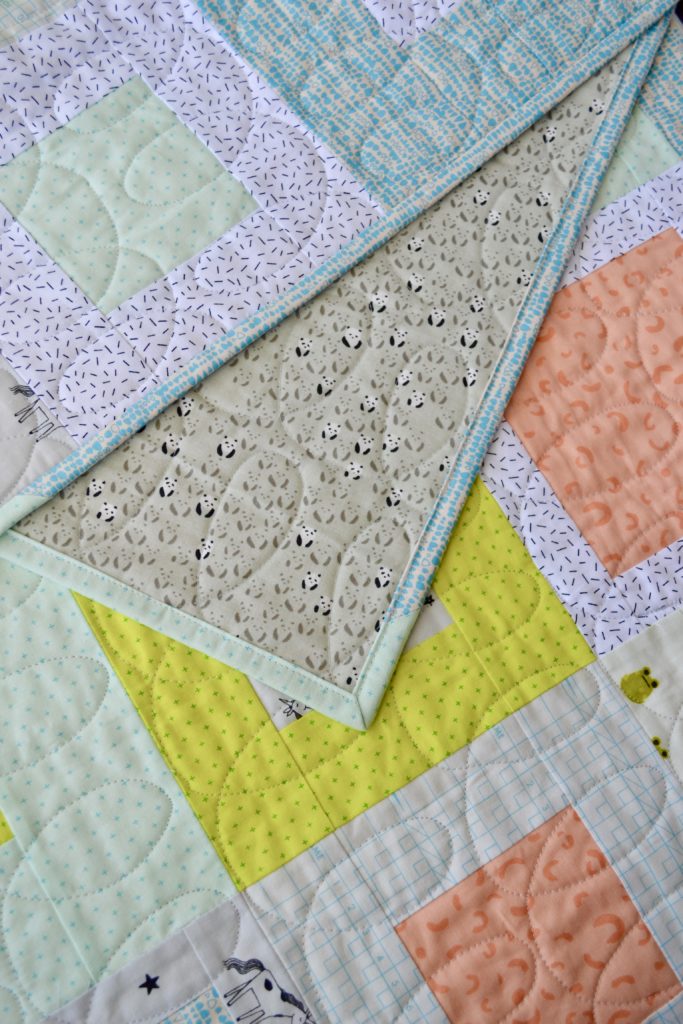
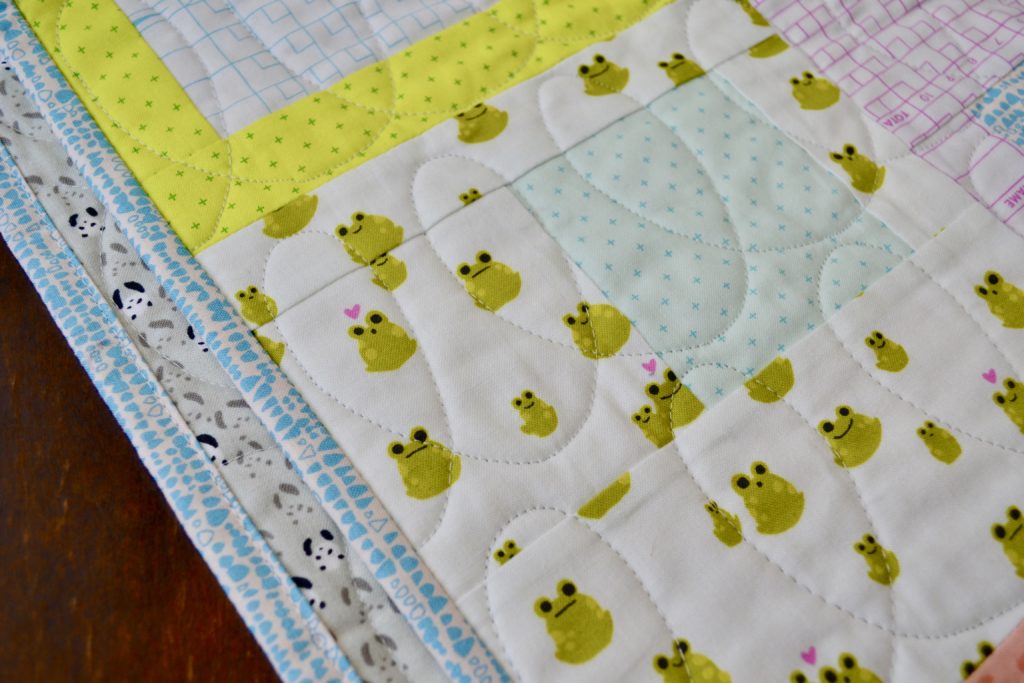
I chose the size of the loops on this baby quilt by the size of the blocks. I didn’t want to mark for the quilting, so I used the guidelines of the bottom edge of each block to make my first row of loops, done left to right. I extended the loops about halfway up the block, just by eyeballing it.
After quilting each initial row of loops across the bottom half of every block row, I went back and did a second row of loops in the top half. I extended these loops up close to the top edge of the block. As you can see, I like a little variety in the size and shape of my loops. Allowing for a little variation keeps me sane and adds to the visual interest, in my opinion!
This is a good beginner FMQ design since you start quilting on the batting, and end on the batting. There is no need for thread burying or knotting! The predictable direction of the design also makes it beginner friendly, unlike a meander that requires you to make quick decisions about where to go next while you are stitching.
General tips
I recommend reading other, more comprehensive guides to free motion quilting and watching YouTube videos if you are new to free motion quilting, but here are some basic tips I’ve found useful!
Support the weight of the quilt as best you can with a large table or chairs to catch it when it falls off the edge. Sudden tugs and pulls are a recipe for disaster!
Wear quilting gloves! It may feel silly, but they really do make a difference in how you are able to grip the quilt and move it effectively.
Frame the area you are quilting with both hands, making it flat and gently taut. This can be challenging with a large quilt bunched up in the throat of the machine, or in your lap but it will give you the best results and control!
I much prefer bunching to rolling for managing the quilt while FMQing. Bunching accordion style into the machine throat allows the quilt to move and expand with ease as you quilt in that direction (left to right).
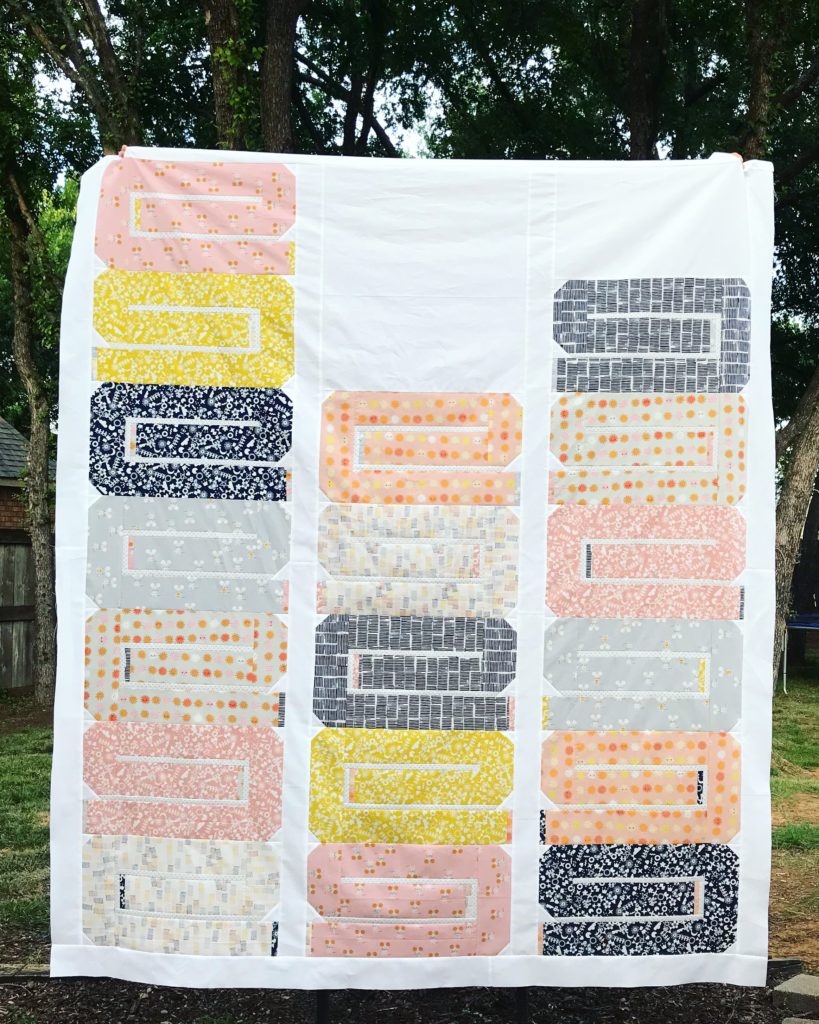
Let’s talk about my newest pattern, Hello House! It’s baby size only for now, but I can guarantee it would be fab in throw size. Can you say housewarming gift??
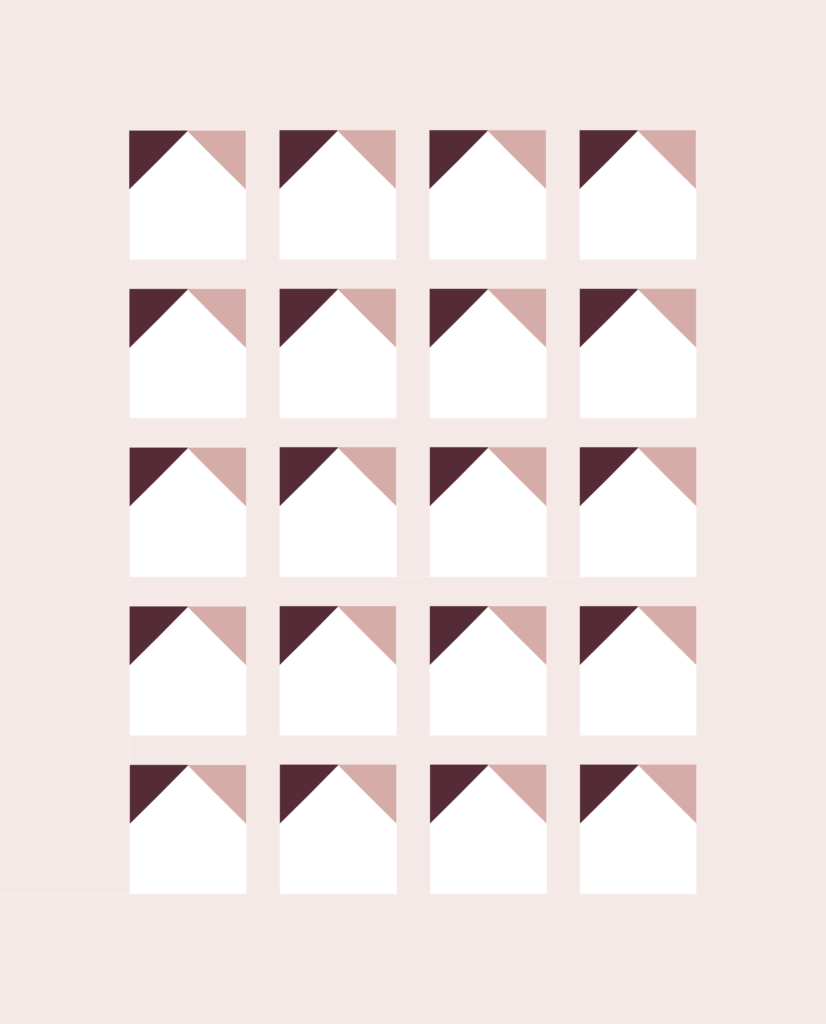
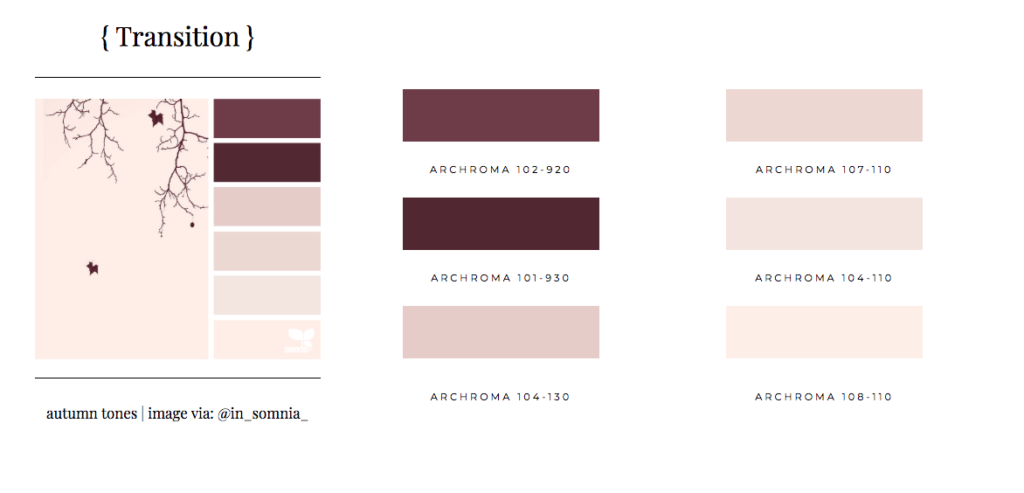
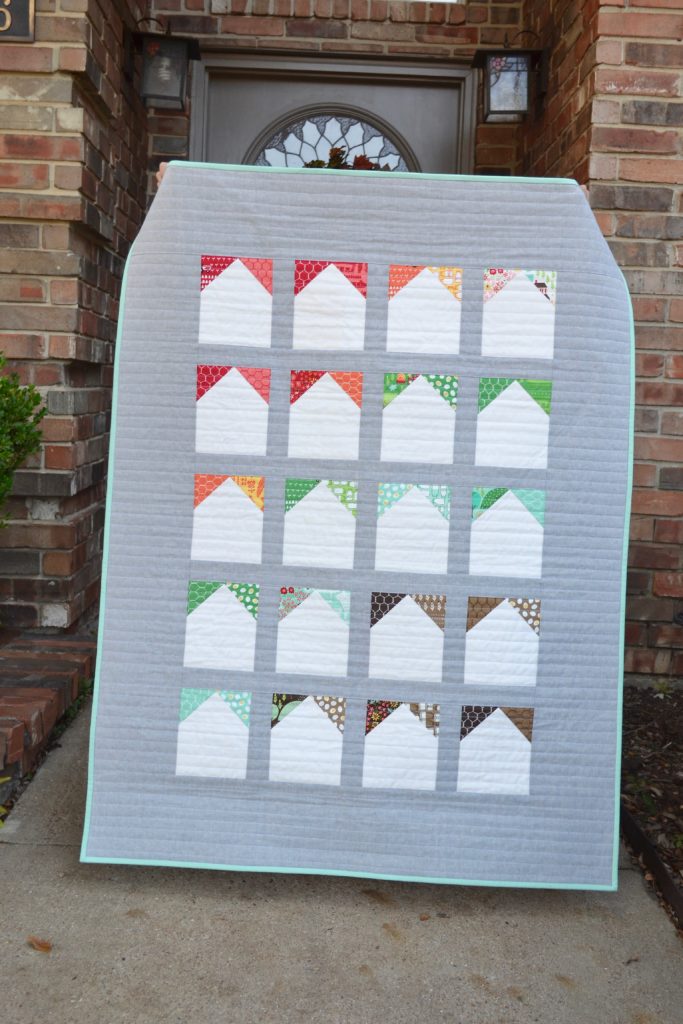
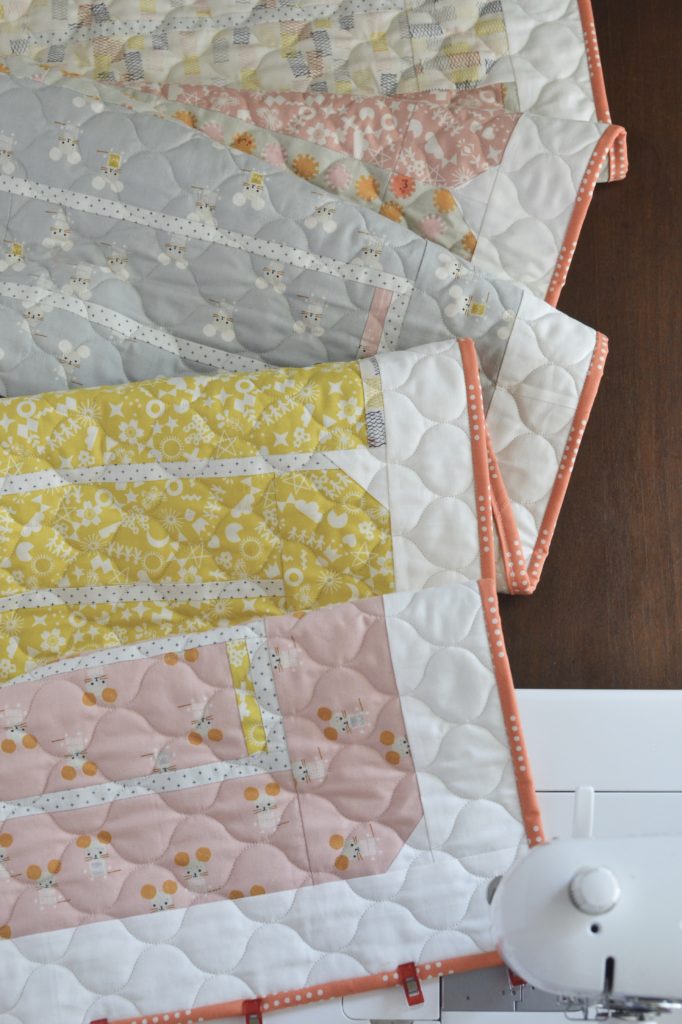
When I designed this pattern I wanted something modern and simple. I started with the color palette below, inspired by the Design Seeds image, and called it Good Night House. One side along the rooftops being dark and the opposite being light reminded me of the same thing happening in the sky at sunset, when you say good night. If you haven’t checked out Design Seeds yet, it’s a terrific source for color inspiration!
When it came time that I needed a baby quilt for a friend’s shower, I knew I wanted to try out these houses I had been playing with. Wanting/needing to work within my stash, I remembered the adorable little Farm Fun by Stacy Iest Hsu charm pack I had been holding onto for so long. My friend is “team green” so the sweet little farm prints seemed perfect not knowing if baby is a boy or girl. I am so happy with how it turned out!
I did still arrange the accent pieces above the houses loosely following darker on the left side and lighter on the right. Although the effect is very subtle, I do think it gives some order to the finished project that your eye appreciates. I tried scrambling the rainbow of houses, but found the fabrics looked best to me in this arrangement diagonal wave of color. The yarn dyed Essex in Steel gives good contrast with every print, and lovely texture.
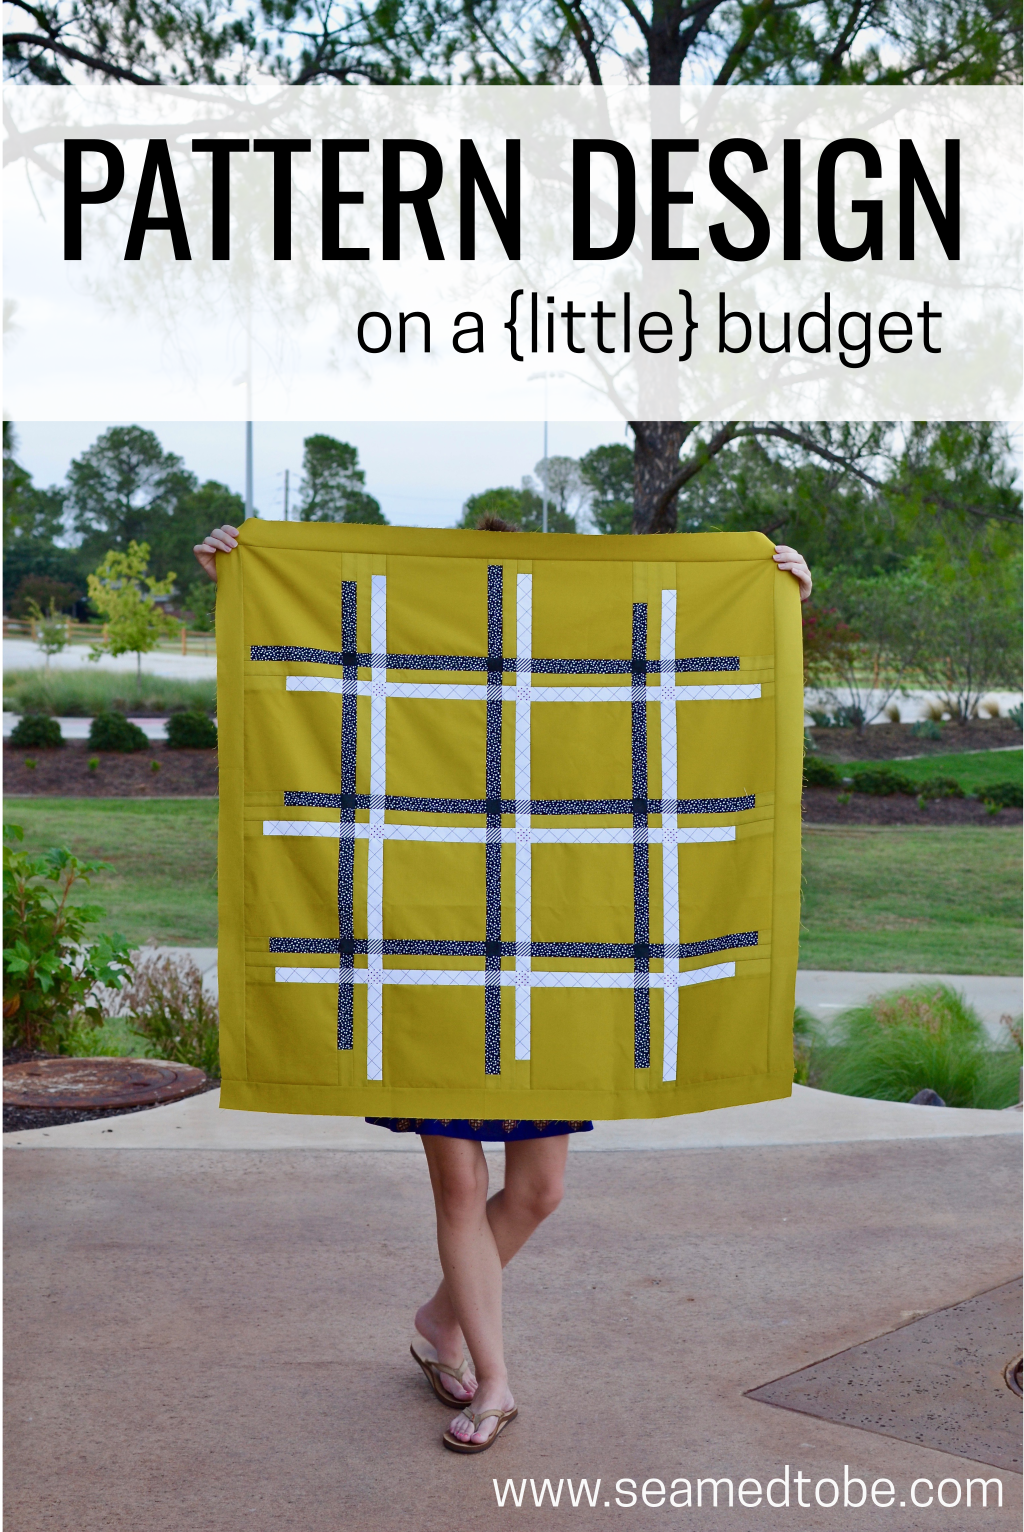
Let’s be real here, some things are easier with money! Money quite often equals access, options, and flexibility in our crafty endeavors. I often find myself drooling over new fabric lines, thinking how wonderful a design idea I have in my head would look worked up in the latest and greatest materials. I frown at my simple quilting motifs when I see how custom quilting can truly bring a pattern to life! Sometimes I tell myself that if I had those things my quilts, and my patterns by extension, would be better and more successful. I could make more samples, more sizes, MORE MORE MORE!
The truth is, regardless of how much better an endless fabric stash would make my cover photo, or how many more quilts I could create by outsourcing everything to a long-armer, that’s just not my situation right now. Most of our family’s spending money beyond bills and food (OH GOD THE FOOD) goes to yoga, ballet, gymnastics, and baseball. > #momlife < Though I quilt like it’s my job, it’s solidly in hobby territory, folks!
SO working within that reality. . .
What’s good about working creatively with limited resources?
Lots of things! For one, it keeps your stash small. You buy what you need, and use it! Storage of my quilting fabric is limited to a few miscellaneous storage baskets in a tall IKEA cabinet. As all quilters know, there is always more fabric than there is money for fabric so it’s best to know your financial and spatial limits and stick to them. Continue reading →
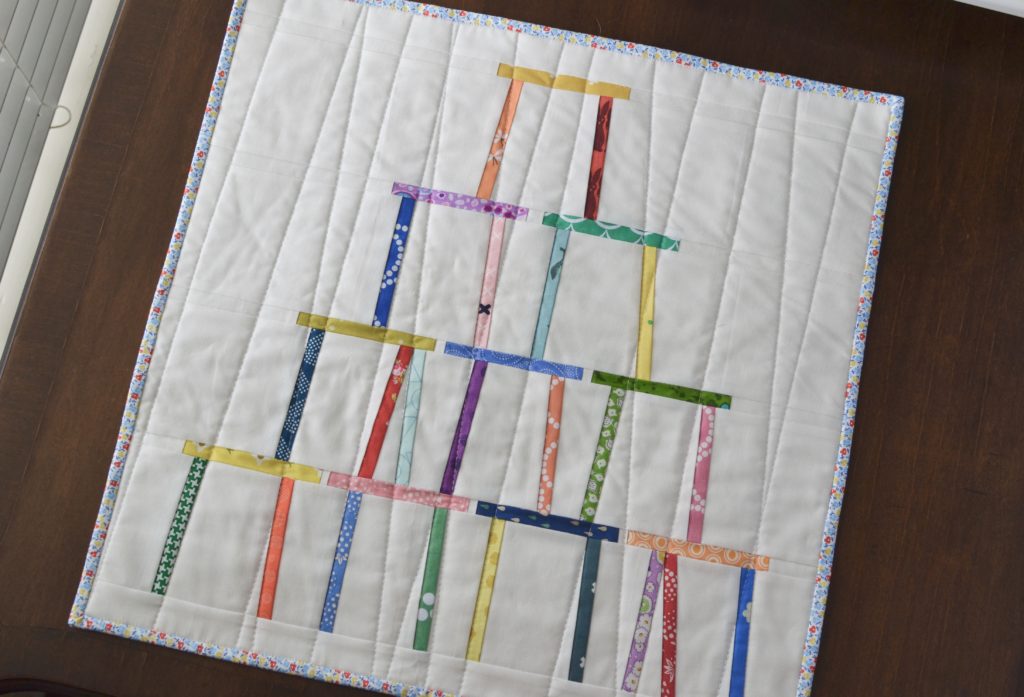
I am happy to share a super fun little @seamedtobe original paper piecing project with you all- the House of Cards Mini Quilt! This post will take you through how to make your very own. This mini quilt finishes about 19 5/8 wide by 19 1/8″ high making it a GREAT option for a pillow cover as well!
Don’t do paper piecing? Below are the reasons why you should try this!! This is a TERRIFIC project for a new paper piecer- with an impressive result!
32 of the pieces, the “cards”, are all the same size and shape so fabric prep is easy.
There are no triangles or otherwise funky shapes to make placement for stitching complicated.
Construction of the sections is done Left to Right, so you don’t even have to follow numbering.
There are NO seams to match between sections! None! Zip! Nada!!!
First things first- I’m on Craftsy now! I had been putting it off like so many other things on my summer to do list, but once I finally sat down to do it, it took less than 10 minutes for me to get my Keeper Quilt pattern listing up on and running on that platform. Can we get a big HOORAY for good things that are easy?! You can view it here if you are so inclined.
Releasing my Keeper Quilt pattern soon after school released and right before we left on a family vacation made for such a scramble in my brain, I never even blogged about it! SO here I am blogging about it ;)- this adorable pattern is truly a quilter’s quilt filled with quilts and is for sale in two places- my website’s PATTERNS tab and Craftsy!
I heard on NPR once that we have a finite amount of willpower each day. This willpower, also referred to as mental energy, is depleted each time we exercise it. Making decisions, enduring unpleasant experiences, deferring satisfaction. . .all these things use our willpower. Something as simple as waiting to use the restroom when you really need to go is a drain on your willpower.
Parenting requires a LOT of self control, and therefore a lot of willpower. Have you ever felt like you’ve reached your breaking point around 5 pm? 11 am? Haha! The interviewee posited that since willpower is a limited resource, we should be aware of how we are using it. I know parenting and running a household get most of mine, leaving the well a little dry for the sewing side of my life.
“What’s the point of all this, Robin??” Well, I LOVE to quilt and to keep it feeling like love, I go easy on myself! Easy for me is not sweating the small mistakes. Since I don’t typically sell my quilts or enter them in competitions I have few pressures to create perfect projects. This works out well for me for two reasons:
I don’t like to practice. I don’t want to make a test block when that time could make a real block. I don’t want to make a sample quilt sandwich and test out quilting. I prefer to practice my skills on the real deal, but starting real + small is definitely advisable.
I don’t like to re-do. Ripping. Is. The. Worst!!!!!!! I already sewed it! If I’m going to UNsew it, it has got to be bad. I rarely rip out quilting barring a major tension disaster or other machine malfunction. For me, quilting is the slowest to unpick and the most rage-inducing. AVOID.
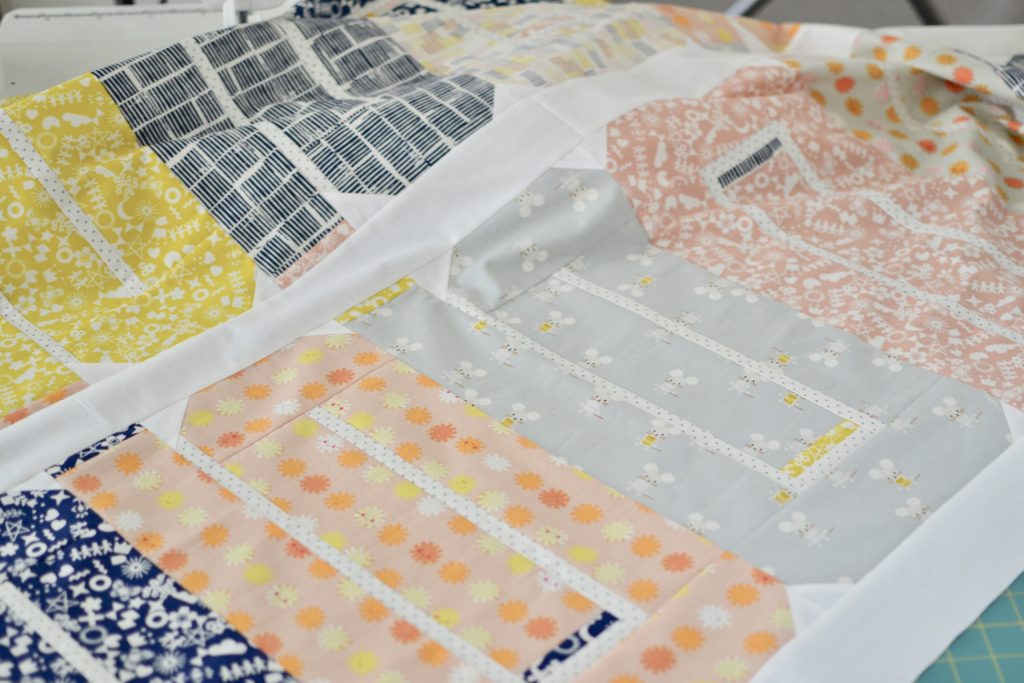
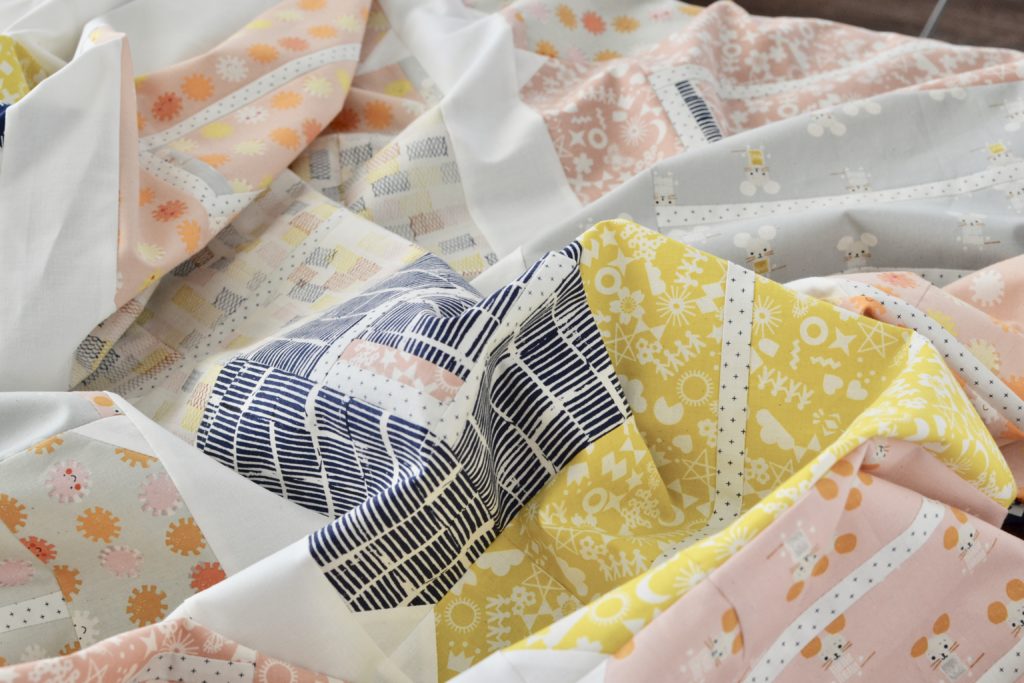
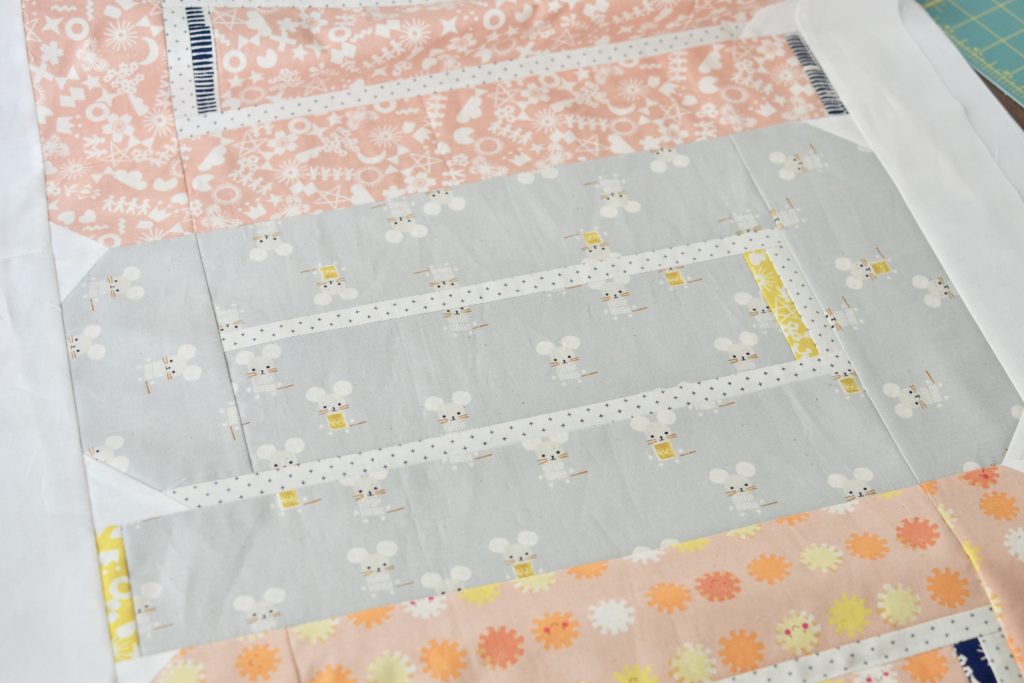
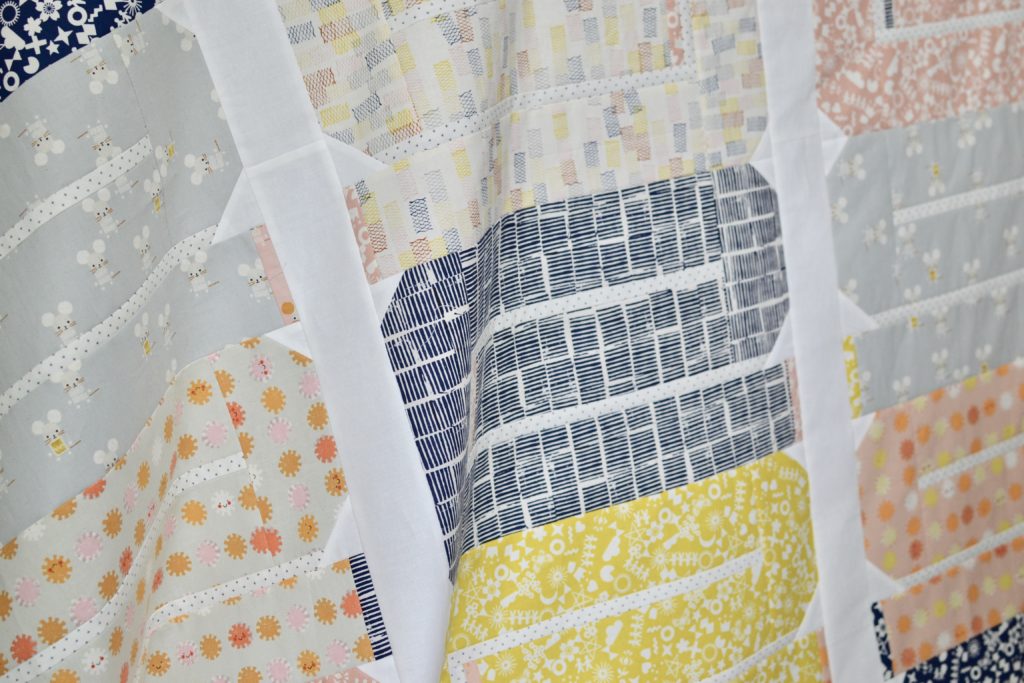
What if I told you there was a quilt that was quiltier than all the others? A quilt made of quilts?? IT IS TRUE, FRIENDS. IT IS TRUE! Introducing the Keeper Quilt! I wanted my first design to share with you all to be light hearted and fun. This pattern embraces what we all love —> quilts, duh <— and puts them on display in tall, glorious stacks. Each complete with contrast ‘binding’ and carefully ‘folded’, the individual quilt blocks are about the size of an actual 3D folded quilt which just makes my brain so. . . happy?? Tickled? At peace with the world? Whatever, it just feels right!
I toyed with naming this pattern the Collector Quilt, but it felt too dismissive of the many hours of work and love we pour into these projects. Sure, a stash of quilts is a collection, but individually each was slowly and thoughtfully assembled with a specific vision and destiny (too far? haha) in mind. Anyway, these quilts you keep after making are special! They are KEEPERS. The Keeper Quilt is a warm tribute to the fascinating and often therapeutic process of cutting fabric apart and putting it back together in the shape of a keepsake that has a special place in our heart.
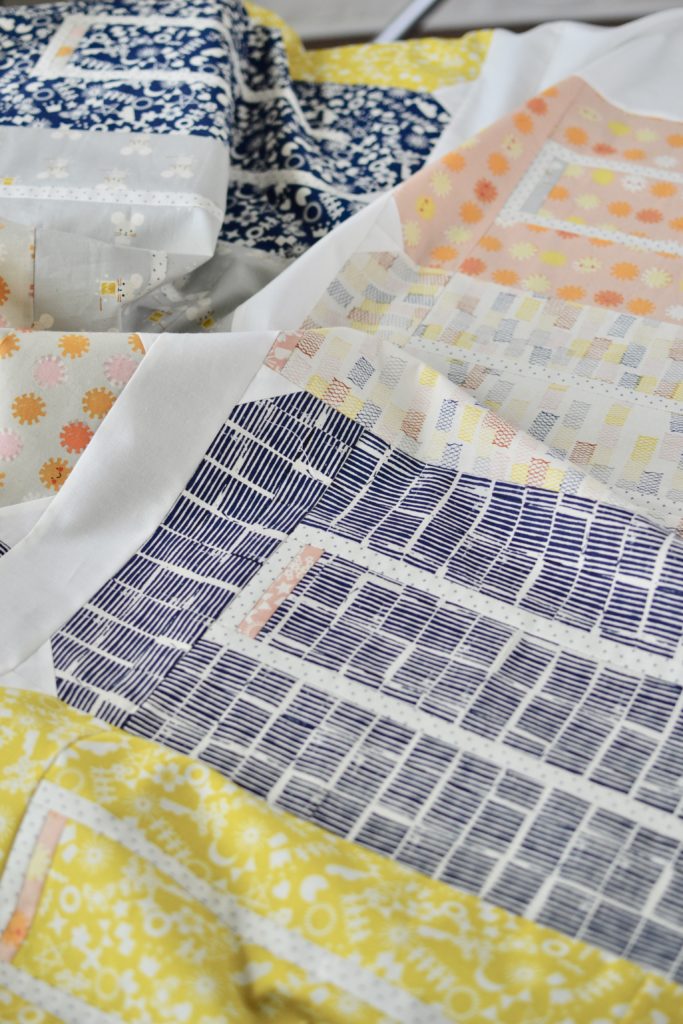
This version features a variety of Cotton + Steelprints from three collections. I fell in love with the two colorways of suns and mice from the Sunshine collection by Alexia Abegg , and added in complementary colors from the Papercuts collection by Rashida Coleman-Hale. The two color “Cut It Out” prints are so simply perfect and versatile and you need them in your stash NOW! As I started cutting, piecing, and pairing prints I realized I needed another navy to balance out the color scheme. Hearth in Indigo was the perfect solution and I quickly grabbed some from Fabric Bubb. Kristina ships SO quickly and has a beautiful selection of modern fabric- go check them out if you haven’t already!
Stay tuned here and on my instagram account for pattern release information THIS SUMMER! In the meantime I’ll be here in front of my computer googling things like “how to technology” and “SEND HELP”. Just kidding. But seriously.